

Caution: Since first putting this page up I have still not found either a fully reliable method for body-marbling, nor one in which it can be considered to be fully safe. I leave this page up as a record of my experiments, but recommend that you look for one of the commercial suppliers like Mile High FX if you wish to do it yourself.
Jan 2024
Since I put up this page originally, videos of people marbling their arms have gone viral, and hence I have started to get quite a few enquiries about the technique. Unfortunately I have found the process very sensitive to relatively subtle changes in materials and techniques and so at present I am not in a position for this page to be a full tutorial yet. I hope to be able to do this in the fullness of time.
If you have arrived directly at this page from a web search, I would recommend also reading my gunge and slime page Gunge & Slime as this will give you an introduction to thickeners that can be used for the size bath.
One
of my friends, Emily, shared a link to a video from BL visuals at a
festival in the USA running a stand where participants were able to
marble their arms.
We both thought this would be an interesting artistic
activity to try out- and so set a summer date.
Materials
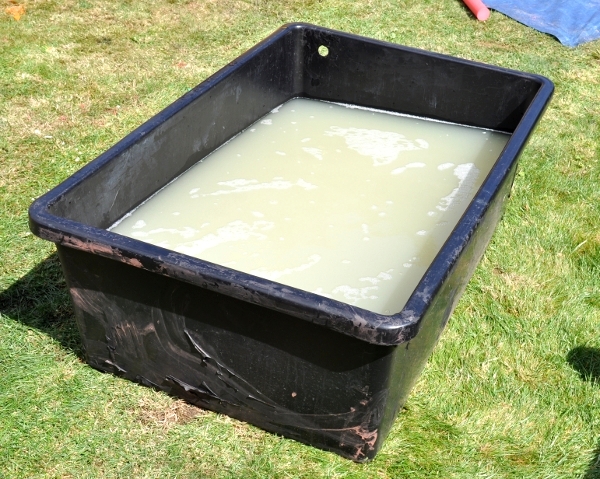
Size bath
The marbling is carried out in a bath of a material known as
size. This is essentially container of water with a thickening agent mixed into
it. In our case the container was a 60litre plastic drum which enabled an arm to
be dipped in to a good depth.
Mordant
Marbling artists pre-treat the materials that they are
working on with a material called a mordant- this helps the colourant bond to
the paper or fabric normally used. The normal chemical used for this is known as
Alum (Potassium Aluminium Sulphate).
The material is dipped in a solution of alum and then
thoroughly dried prior to marbling. In our case we made a weak solution in a
dustbin of water (approx. 0.1% w/w).
Colourant
The colourant needs to have a number of properties which
include low viscosity to easily spread on the size, high pigment content so it
can still colour effectively when spread thinly, and to be strongly adherent.
The obvious option here is to use artist’s acrylic paints, watered down slightly
to be less viscous. I have a range of acrylics from different manufacturers and
in experimenting found that some worked better than others- particularly in how
readily they spread.
Those carrying out marbling on paper and cloth also look at
controlling the surface tension of the paint- we haven’t tried this yet, but it
has potential to make a reasonable difference to the results as it potentially
means the paint would spread to a more consistent film.
Other items
We used disposable pipettes to drop the paint onto the size,
but squeezy bottles could also have been used.
We used a barbeque skewers to drag the patterns- any range of
pointed implements, rakes etc could be used to produce patterns.
There is a need to skim paint off the size surface between
dips- we used disposable paper towels, but other absorbent paper such as
newsprint would also work.
A hair dryer, fan heater or similar would be good for
speeding up the drying time.
We found a variety of scales, pots, plaster mixer, lolly
sticks etc useful
Process
Arms
We started off by preparing a batch of thickener in water and
letting this stand for a while to fully thicken- I used a plaster mixer to make
sure the mixing is thorough. We made sure that the surface was free of bubbles,
lumps or any other floating foreign bodies before starting the
marbling.
Whilst waiting we prepared a few colours of paint by watering
down and ensuring thorough mixing so the resultant mix was lump
free.
Skin need to be clean and free from excessive grease or sweat
otherwise the coating becomes uneven.
Hands were dipped into the alum solution and allowed to dry
thoroughly naturally.
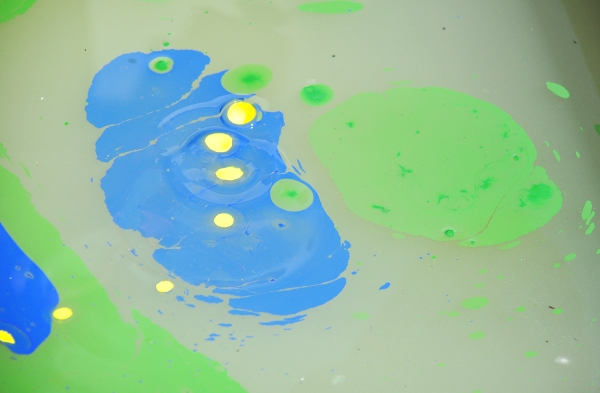
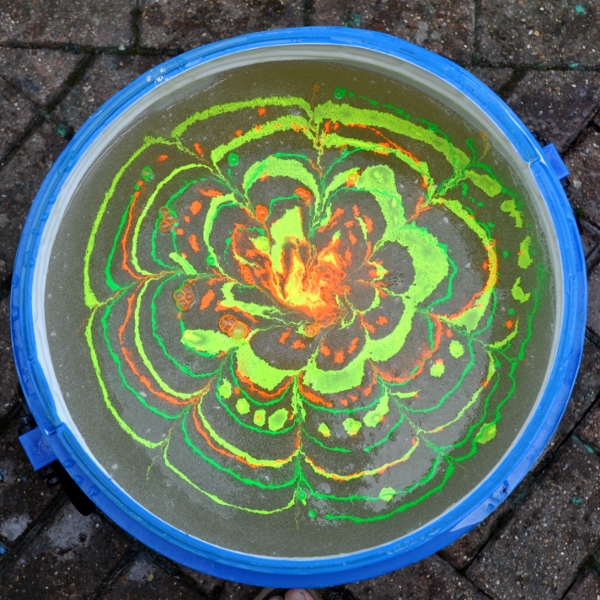
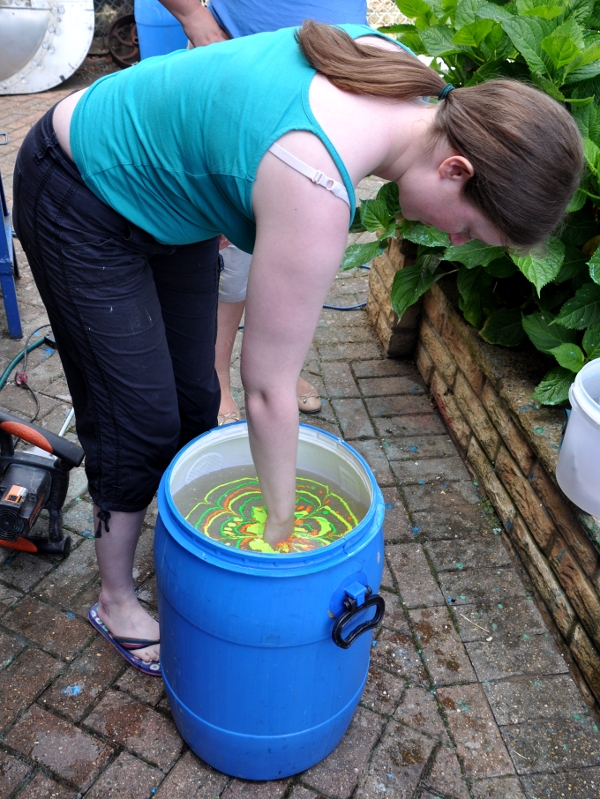
The marbling bath was prepped by placing drops of coloured paint on the surface, and raking with a barbeque skewer to create patterns.
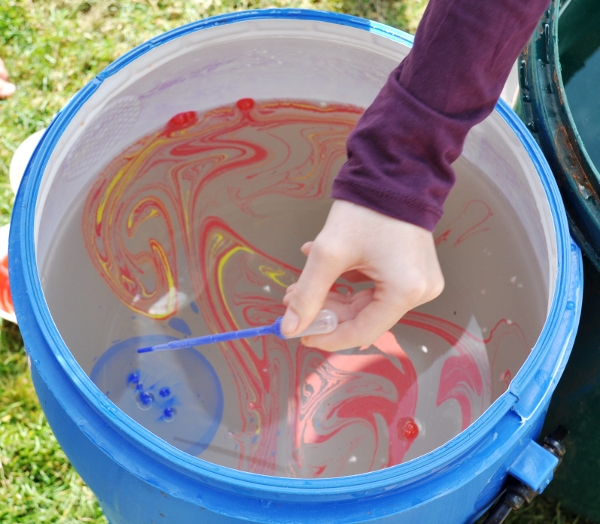
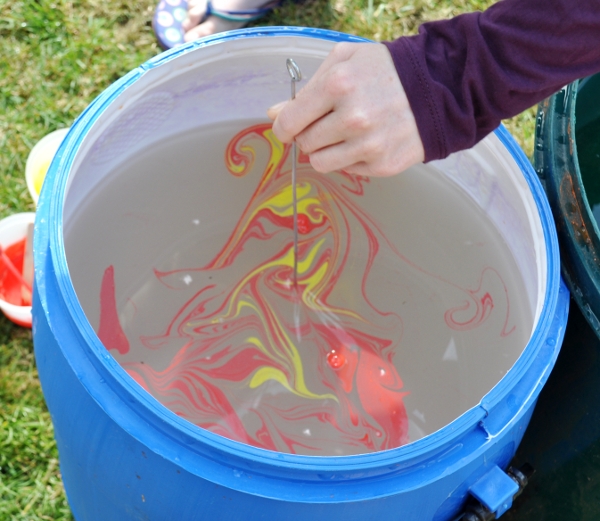
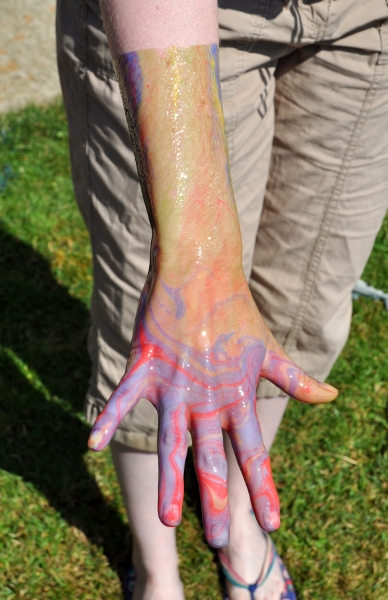
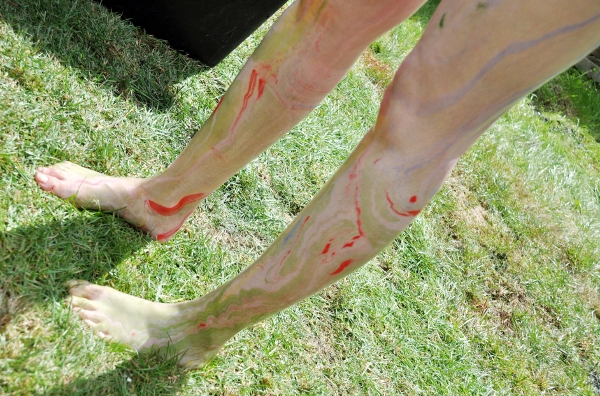
Once dry, we dipped our hands into the fluid and withdrew slowly. We again let them air dry (although a warm air blower could probably be effectively used). It was possible to get 2-3 dips out of a single patterned batch.
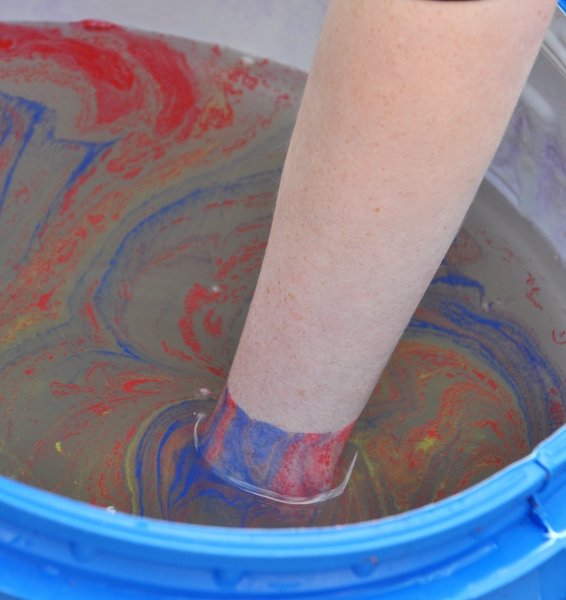
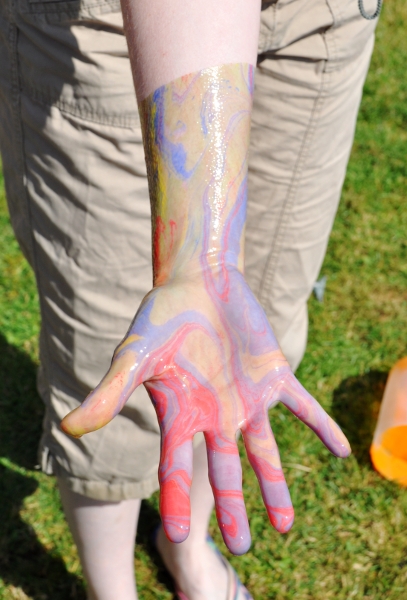
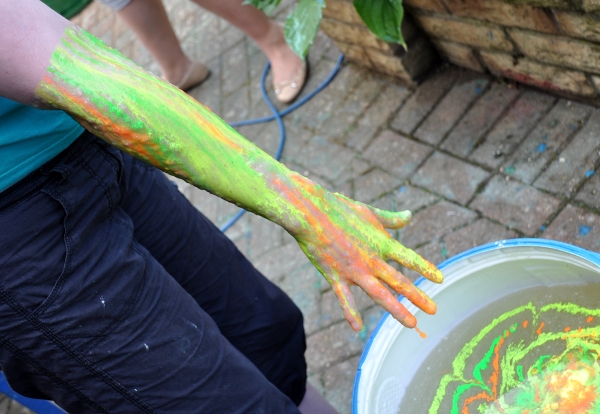
After a couple of attempts playing with the amount of paint, positioning etc. we were reliably getting good patterns, as can be seen from the pictures.
Full Body
Once we found we could reliably marble a small area of skin,
we moved on to attempting to marble a complete person- to the best of our
knowledge this is the first time this has been attempted.
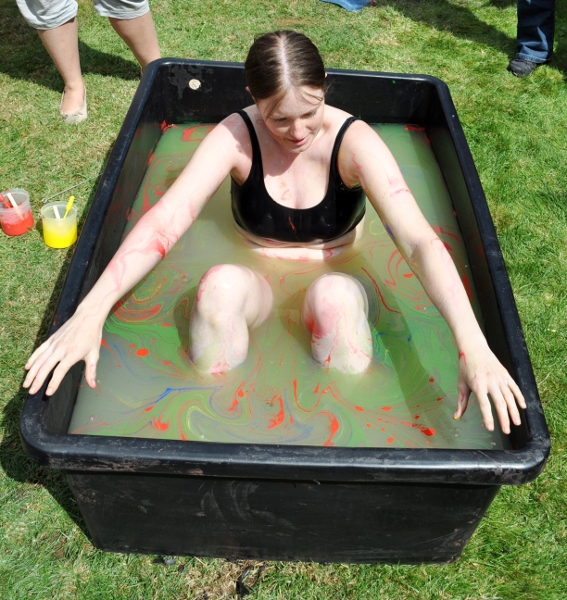
I have a large plastic tub that one can almost lie down in, so we prepared this by filling with a size mix. Emily changed into a bikini and with a helper had an alum solution wash using a flannel and air dried (really needs to be a warm day to do this!).
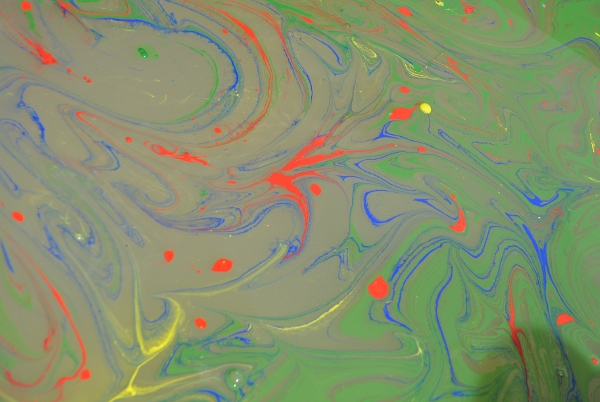
We prepared the bath surface with a marbled pattern in the
same way that we had for the smaller tub and Emily laid back into
it.
The result was good on her back, but proved less so on her front. We attempted to re-marble her front, but this didn’t prove very effective.
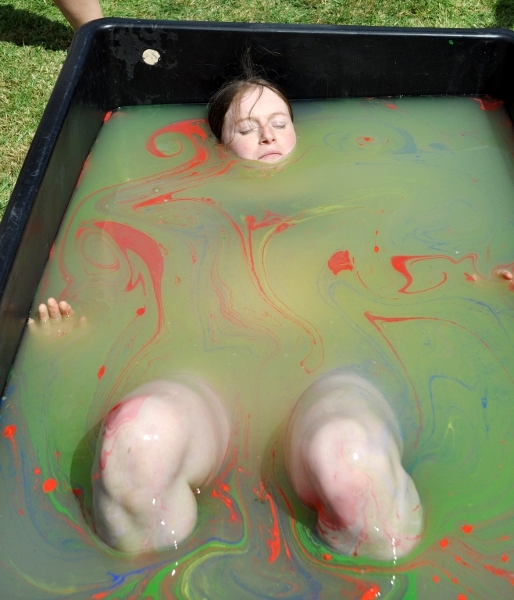
We later determined using the video we had taken that when laying a flat surface onto the bath, the paint is essentially trapped against the surface meaning when she laid back into the tank, coverage was good, but as most of the paint was trapped it didn’t wrap round to the front. This contrasts with dipping arms where the surface is vertical as it goes into the tank. This is therefore something that needs further experimentation on a warmer day!

Notes
It is clear that the equipment needed should be clean, but
needs to be free from detergent residues as this affects the paint
properties.
The surface tension of the paint is very important- art
marblers use modifiers to change the paint properties- we need to investigate
this more thoroughly along with paint strengths and brands to get the best
results.
We are sure that the skin needs to be clean and dry prior to
marbling, but are unsure of the benefit of using Alum to fix the colour, or
whether it’s use after dipping would be better- again we need to investigate
this further.
We have recently carried out another set of trials,
successfully producing marbled patterns with fluorescent paints. We have learnt
a bit more about process which we can now share.
The main thing we have found in doing the experiments we have is that there are definitely windows of optimum conditions and that going outside these leads to poor results. Unfortunately find the optimums is a bit of a challenge, therefore I strongly recommend experimenting with the exact materials before commiting to any projects.

Size bath viscosity
When we initially tried with our first paint mix, the 0.3%
w/w guar mix we had used previously wasn’t working effectively as the paint was
dropping through the surface. We therefore increased the viscosity by going to
0.5% w/w guar which solved the paint dropping issue, but then created the
secondary issue of draining off the skin very slowly, therefore not leaving a
consistent colour film, and hence poor marbling. This demonstrates It is
therefore critical to control the bath viscosity. We haven’t done any tests to
see if the thickener choice can be improved- I suspect it can be. (N.B. 0.3% w/w equates to 3grammes in 1 litre of water)
Paint
This time we used Reeves fluorescent acrylic paint, mixed
with a small amount of water and a couple of drops of Daler Rowney ox-gall to improve
fluidity. We did not make any measurements of the quantities. When we went to
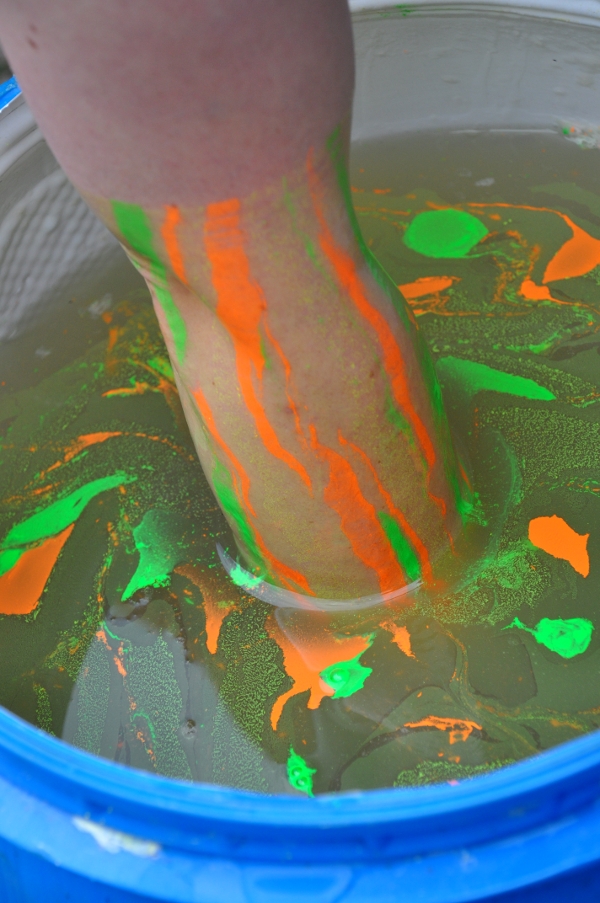
use the paint, we quickly found that the yellow sank, whilst green and orange
spread on the surface as expected. Changing the yellow paint concentration we
were able to get similar results to the other colours. This illustrates that the
paint/ water mix viscosity is critical, as is its surface tension, as controlled
by the ox gall. Unfortunately accurate viscosity measurements are difficult to
make at home, and viscosity of the base acrylic paints will vary by manufacturer
so it isn’t possible to give any recommendation here, other than trial and error
with the exact paint you are going to use. It should also be noted that the
mixing of the paint needs to be very thorough to ensure it is
homogenous.
Having said this we have noticed that the finished effect on the arm isn’t
always easy to judge from the wet version- a couple of the attempts we had
didn’t initially look too good.
I
have recently found some better priced inks sold for this, and will give them a
try as it may reduce at least some of the varaiables:
Alum
We tried dipping in alum both before and after, as well as no
alum at all and found no discernible difference. It may therefore not be
necessary to use alum, possibly as natural salts on the skin may be sufficient,
(assuming skin is clean of excessive oils)
Results
We used blacklight fluorescent tubes to provide the
illumination used in the following photos. Whilst there is more we can do, we
are happy with the results.
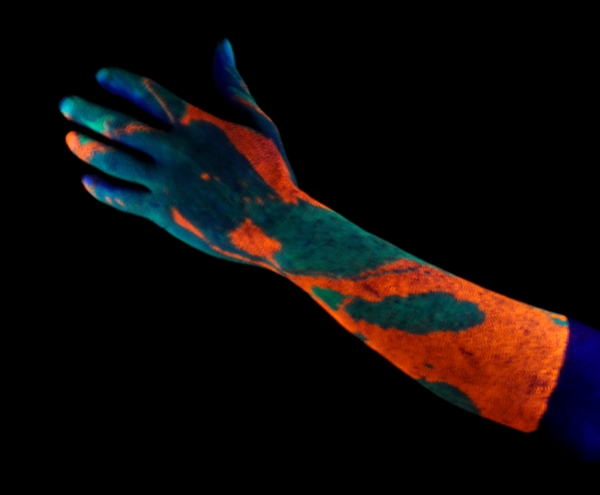
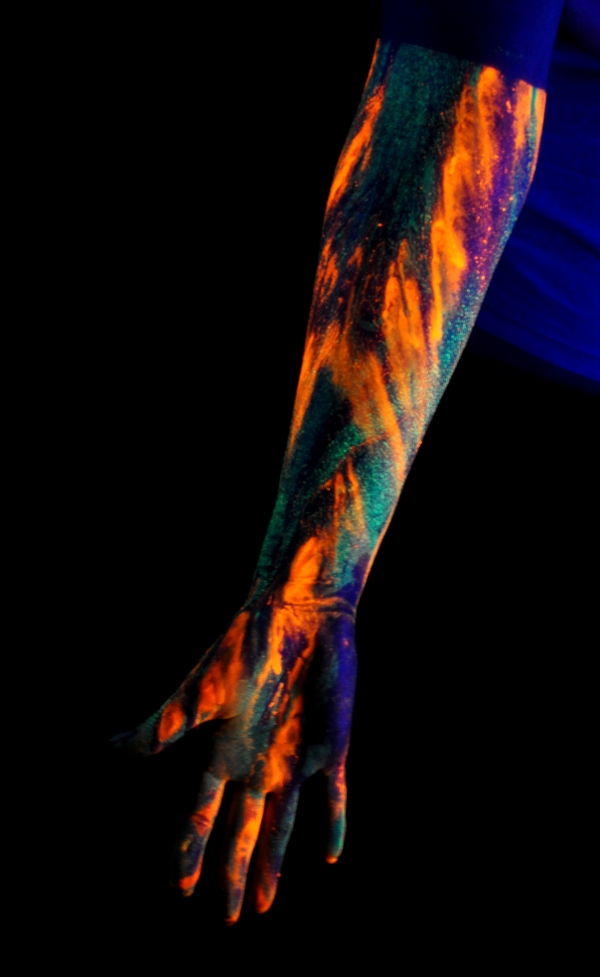
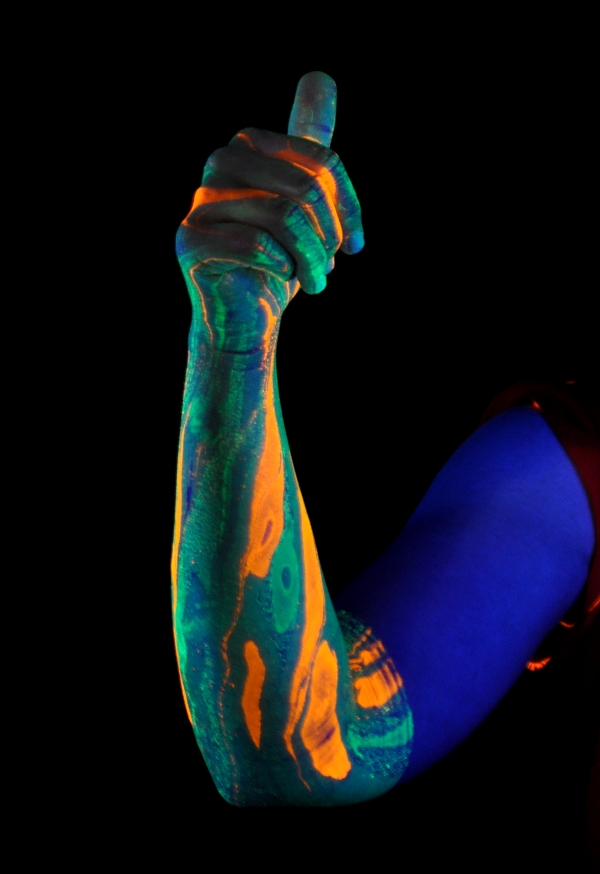
Successfull UV Arm Marbling
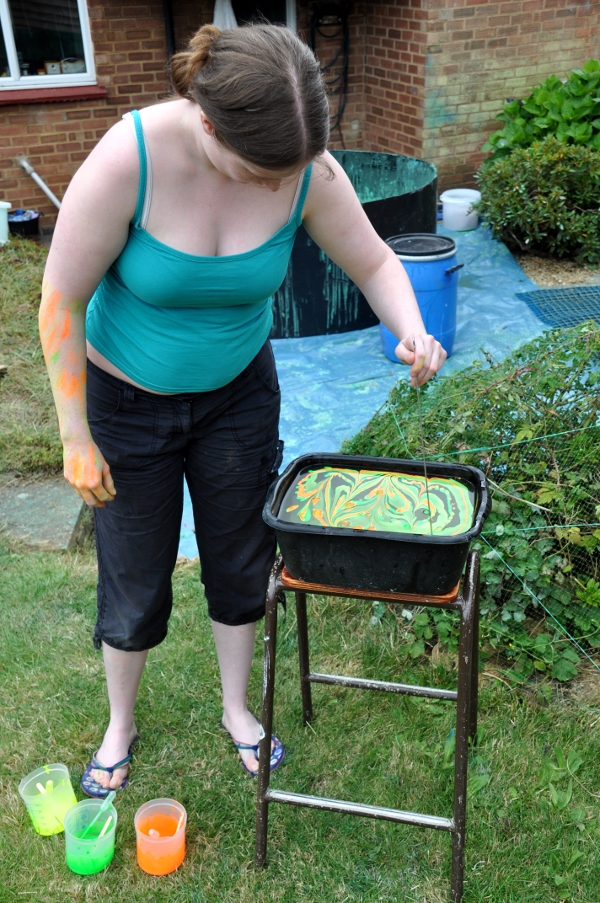
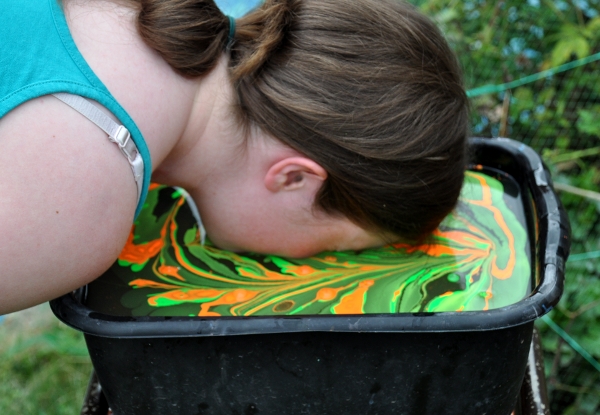
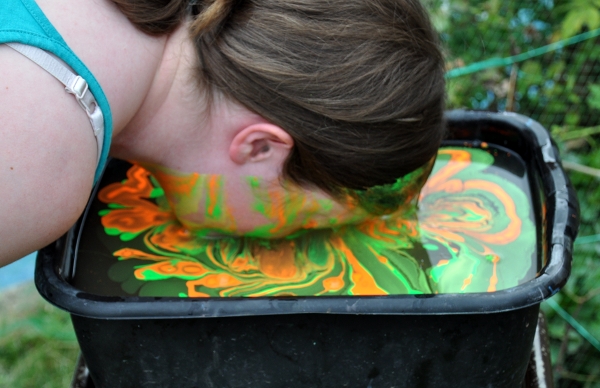
The set up for Face Marbling
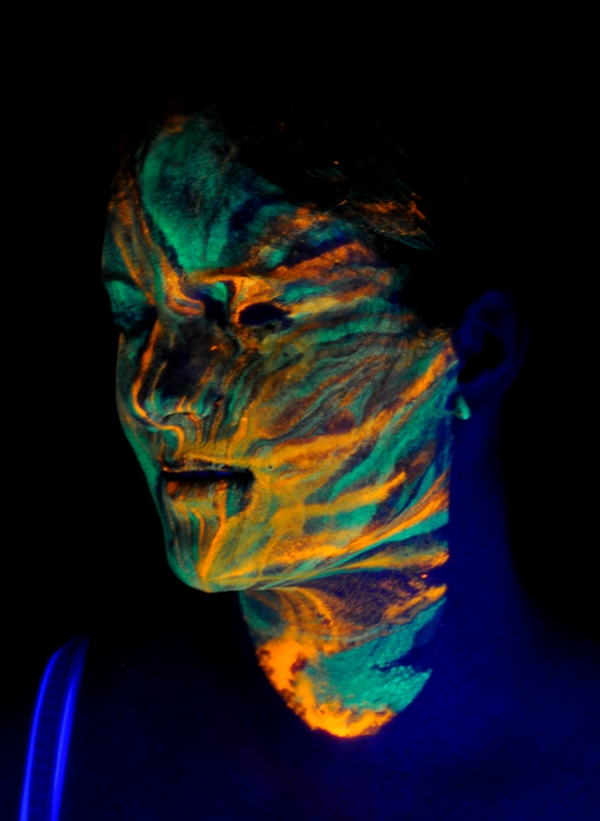
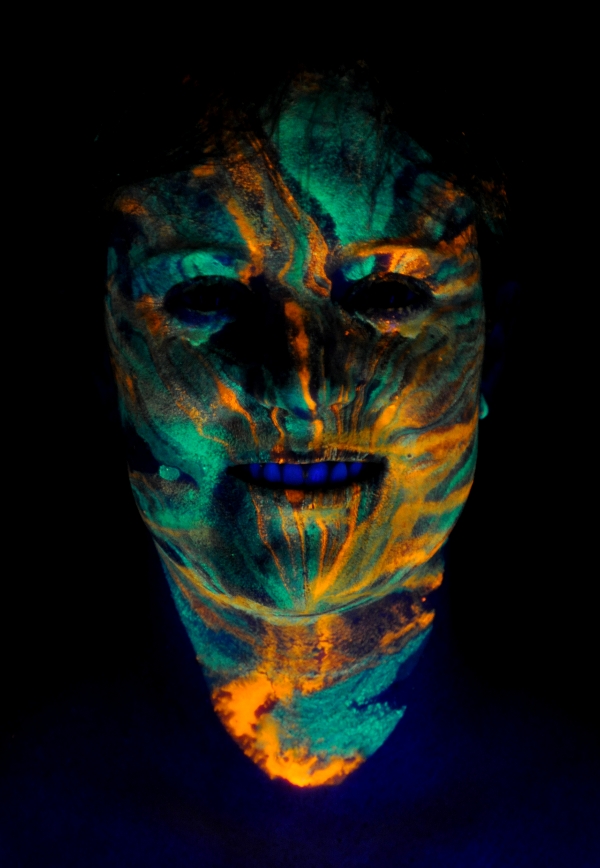

The Final Result
Updates Jan 2018
Since
the last page update, I have received many queries about Body Marbling,
and so this is a short update that should address some of the questions.
I
haven't yet created a full tutorial as the materials used are not
intended to be used for skin contact. Please bear this in mind if
attempting marbling yourself.
A commercial supplier, "I Love
FX" Makeup has recently come onto the scene(a). I have not purchased
from them, so cannot comment on their quality. They have stated (b)
that their ink is alcohol based and similar to their airbrush body
paints.
The inks are expensive, but I suspect will last for a good
number of applications. Their size bath and wash bath however are very
expensive, and make using their products currently prohibitive for
larger quantities, particularly as these are sold ready mixed. Making
these available in bulk as powders at more sensible prices would make
them significantly more attractive (bearing in mind I buy guar gum by
the sack so I know what trade prices the thickeners cost).
They have a facebook group running, but are only interested in people using their products.
In
general, the result is variable, dependent on a whole range of
parameters, some of which I do not yet fully understand. It is
therefore essential to experiment with the materials you intend to use,
along with the process before trying larger batches. Start with thicker
size baths, and paint mixes than intended and dilute if necessary. The
window of 'correct' parameters tends to be quite narrow.
1. Thickeners
I
have found guar gum to work, and I have found xanthan gum not to work.
Other thickeners will likely work effectively, but you will need to
experiment yourself.
Guar gum works at around 0.3% by weight. The
viscosity (thickness) of other thickeners will differ at the same
concentration and so would need to be experimented with.
The 'size bath' should have a viscosity similar to double cream- able to flow cleanly and not leave a thick film on the skin.
2. Wash Baths
We
have been able to marble without using any additional baths to either
clean the skin or 'set' the paint. There may be a benefit to this, but
it is possible to do without these steps, assuming the skin is clean
and soap free.
3. Paint brand
I have tried a number of paint
brands, but not carried out exhaustive tests. To date I have not found
one brand significantly better than any other, indeed paint from the
Pound shop has worked fine. I have found variation from paint to paint
from one manufacturer. I cannot therefore give a reliable
recommendation of brand to use.
4. Problems
If the paint is not sticking to the skin, the size bath may be too thick, or the skin not clean enough
If the paint sinks, the size bath may be too thin, or the paint too thick.
If the paint disperses too rapidly, the size bath may be too thin, or the paint too dilute.
5. Marbling Inks
The Brian Clegg marbling inks mentioned above work nicely on paper, but not on skin.
6. Containers
The most efficient containers to use if just marbling arms is likely to be either a flower trough or wallpapering trough.
7.
I have yet to settle on a reliable process and so won't be able to
produce a tutorial or offer marbling as a service until I have done so.
If you want to be kept up to date, please follow my facebook page:
https://www.facebook.com/superpantstech/
8. I welcome contact
from others, but please note due to other commitments I won't
necessarily respond quickly, and I will not be able to answer queries
that are already covered on this page.
9. I have supported other artists get started in this area- Check out Judi and the Doodlecats for her work(c).
Feel free to drop me a line about your marbling exploits.
References