Projects
All the projects that don't fit neatly elsewhereNuclear Flask GameGame built into thermoformed flightcase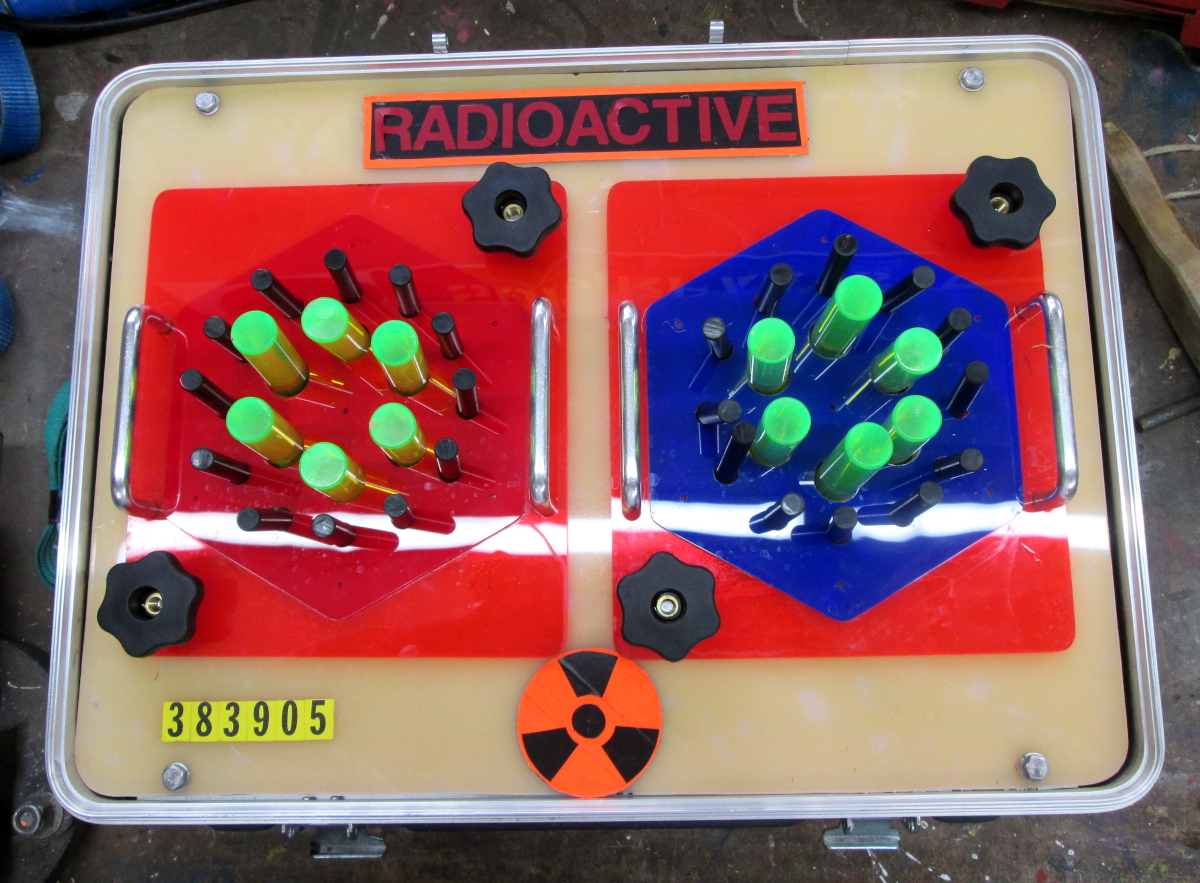 Nuclear Flask Game
Built 2025
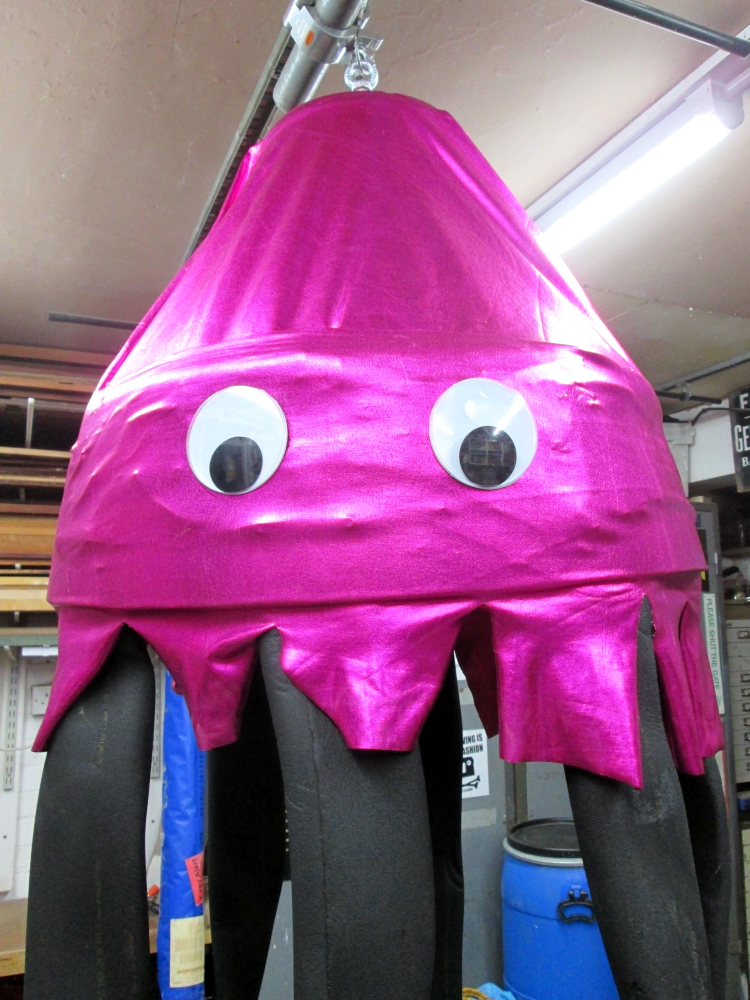 Squid
SquidBuilt 2023
Built from offcuts from of timber from a shed build. One of several in a couple of sizes built.
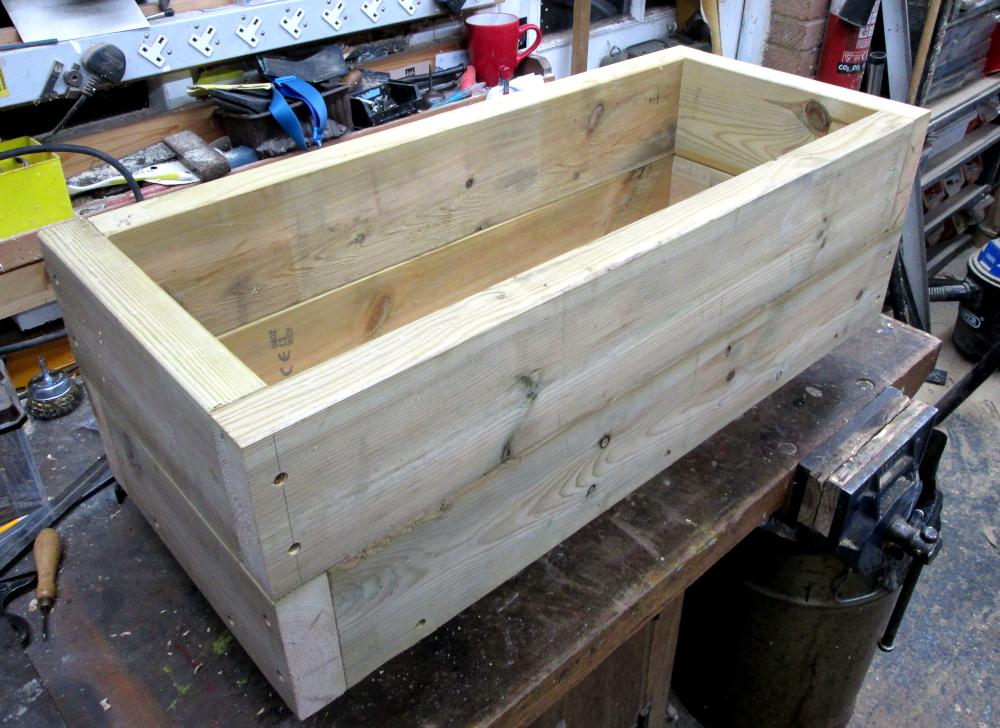 Garden Planter
Built 2023
Drill RacksRacks made from reclaimed beech to store wood bits, driver bits, countersinks etc.Shelves made to store drills and sundries easily accessible to the pillar drill.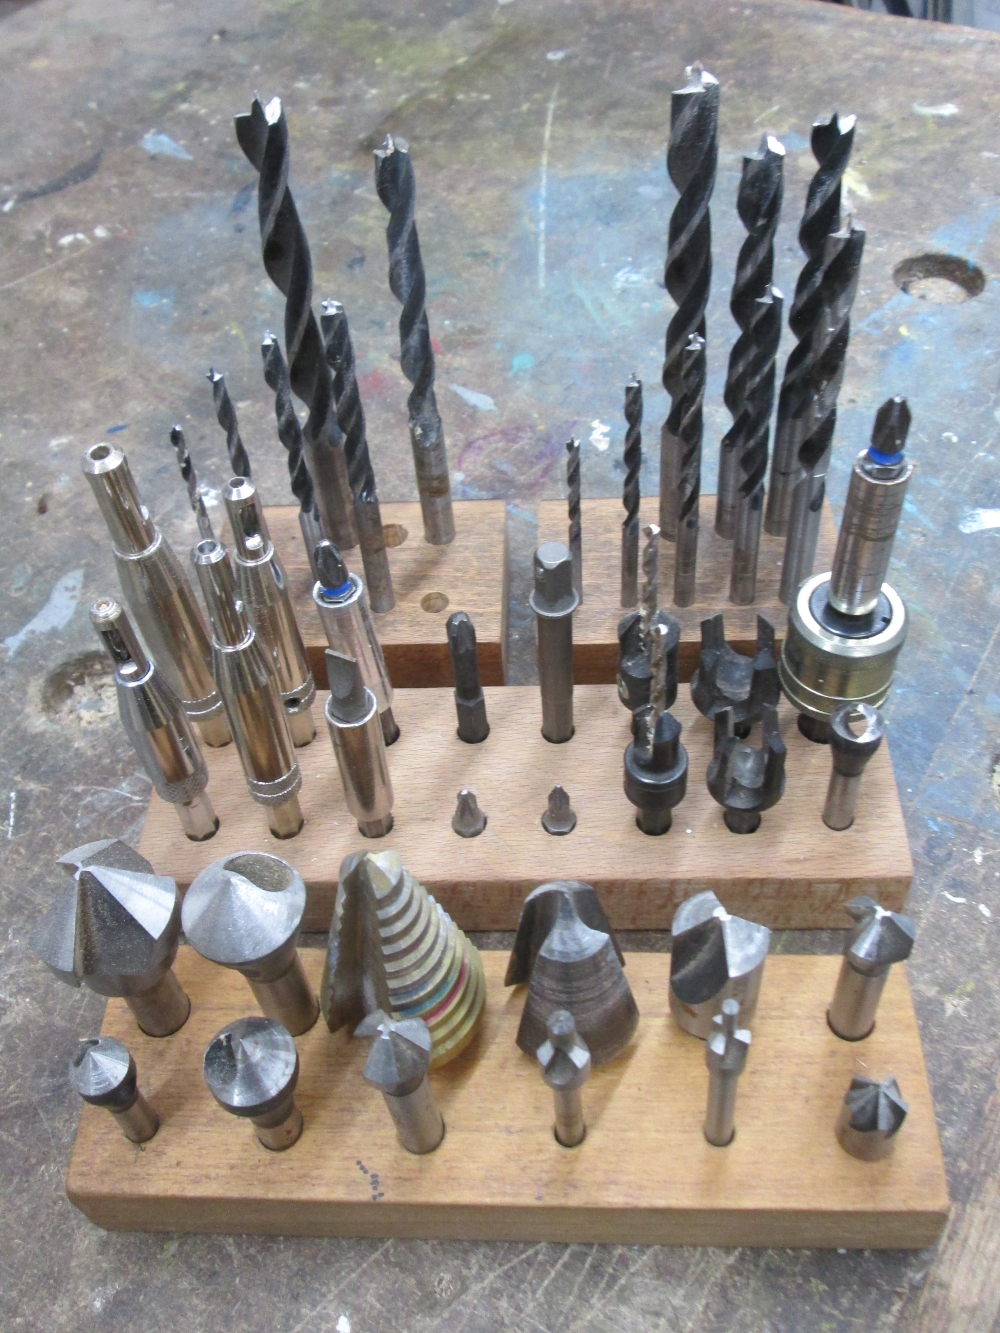 Drill bit racks
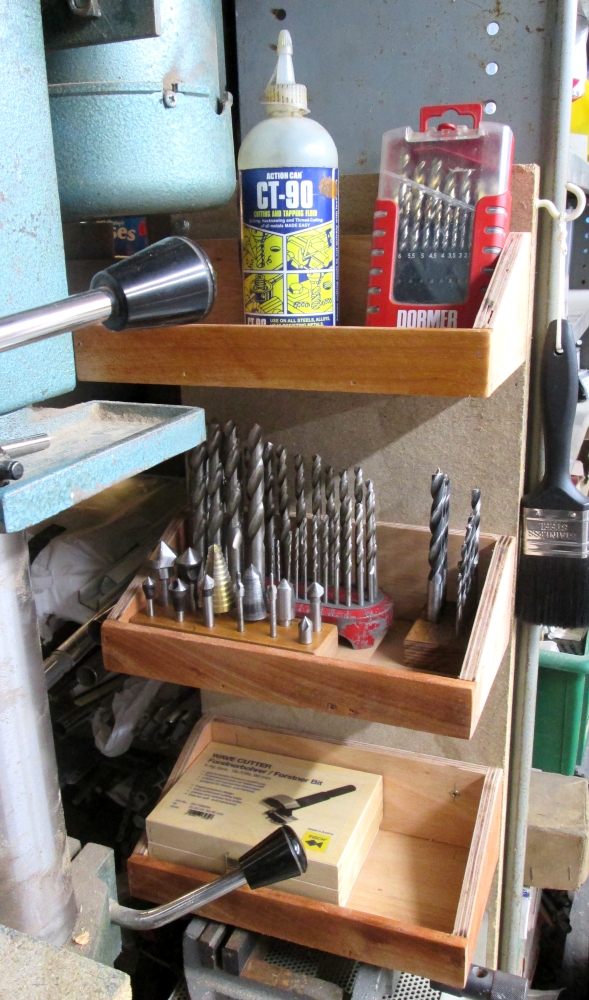 Drill shelves
Built 2023
Tool BoxWhen
both my daughters turned 5, I bought them some basic tools to start
making their own projects. I made each of them identical tote tool
boxes from 12mm ply, and painted in their favourite colours.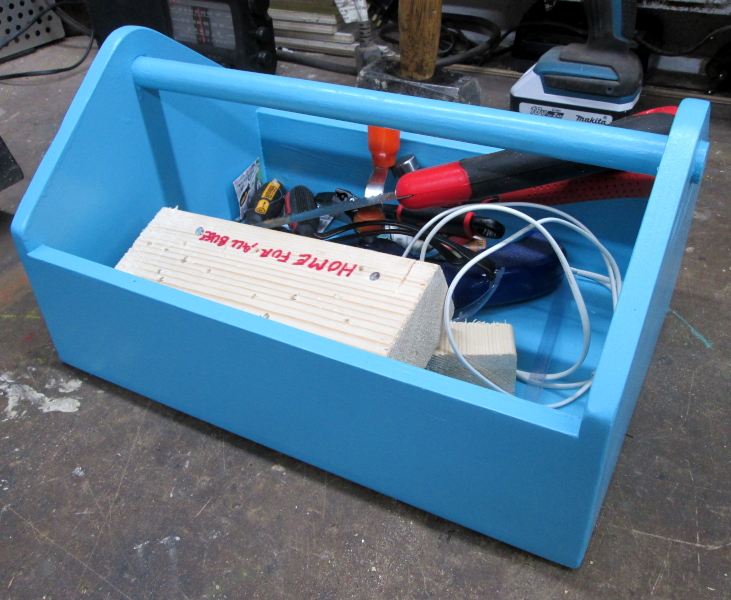 Kids Tool Box
Build Sept 2023
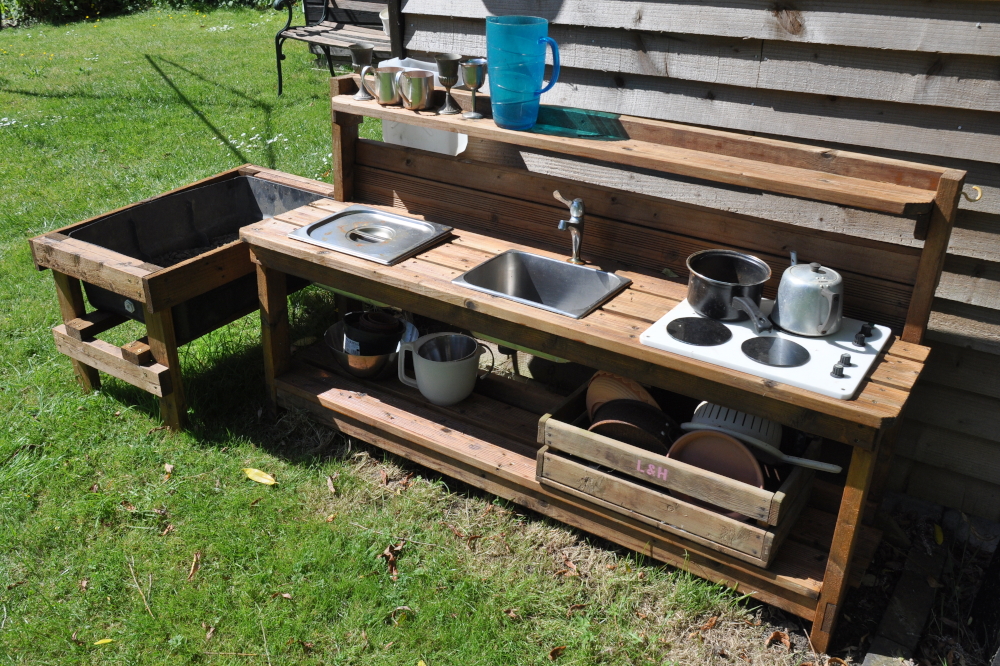 Mud Kitchen
Built 2021
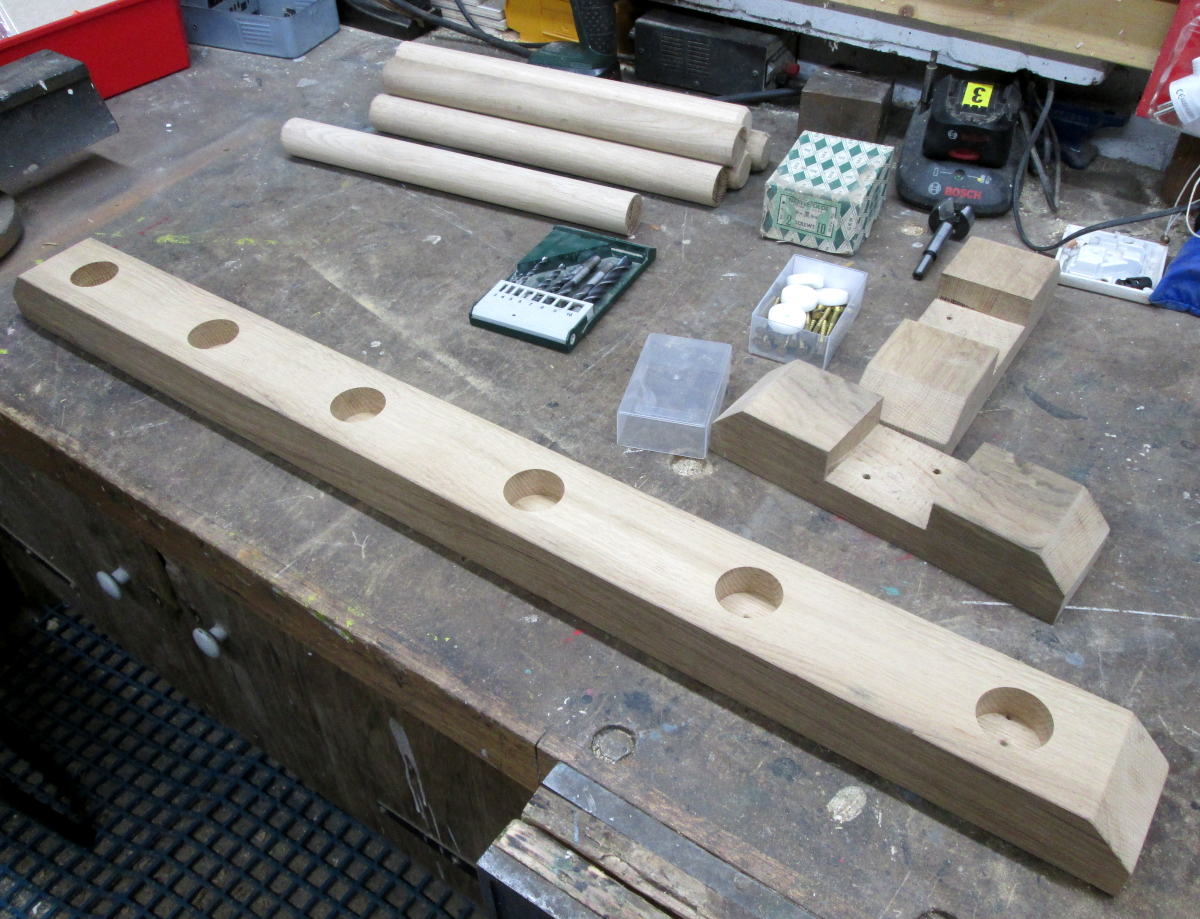
Welly RackWelly
boot rack made as a Christmas present for my sister in law. Made from
oak- the frame was a salvage piece, and the pegs brand new. 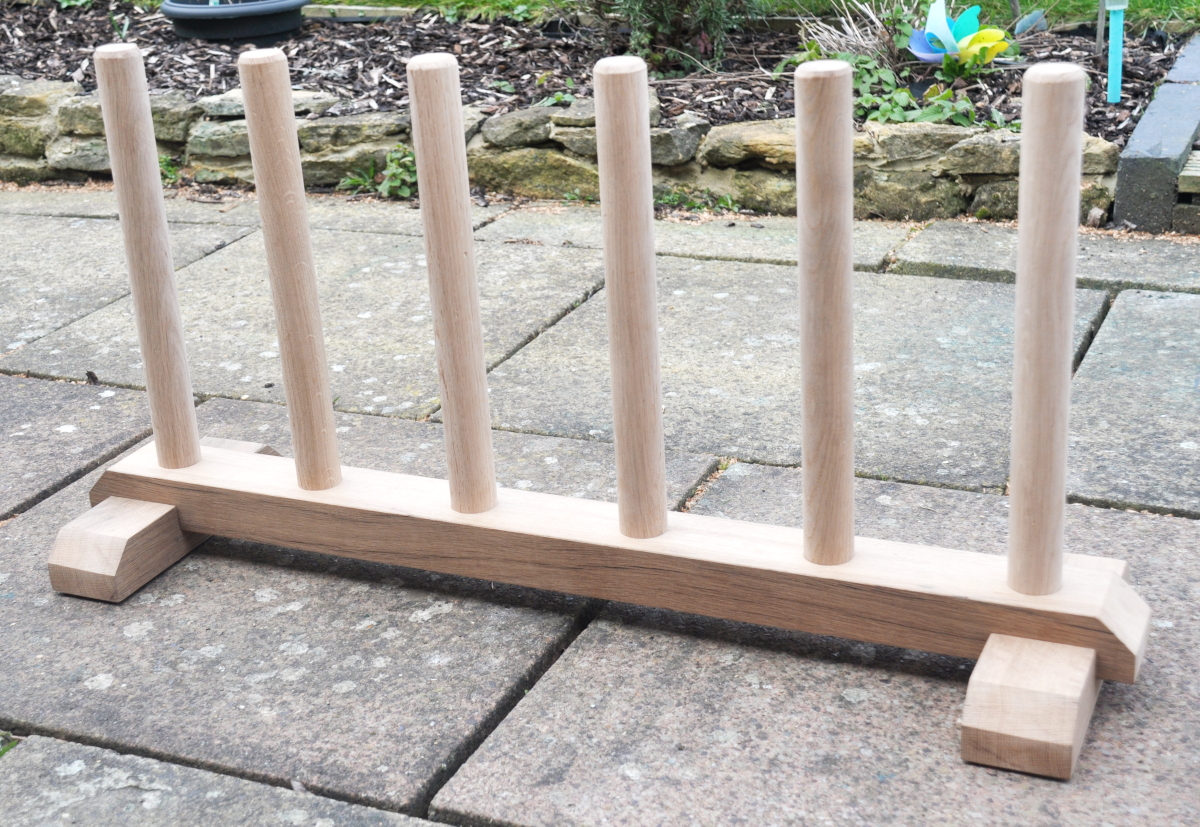
Finished Welly Rack
Parts Before Assembly
Made Dec 2023
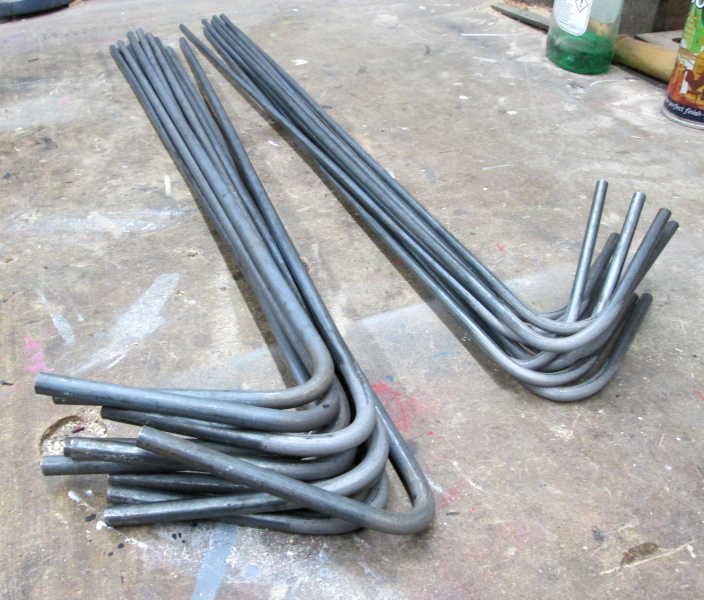
Custom Steel Pegs
20
Steel pegs made for pinning straw bales together for a Scouting event.
These were cut to length using 36" bolt cutters and bent from 8mm mild
steel bar.
Custom Long Steel Pegs
Built June 2022
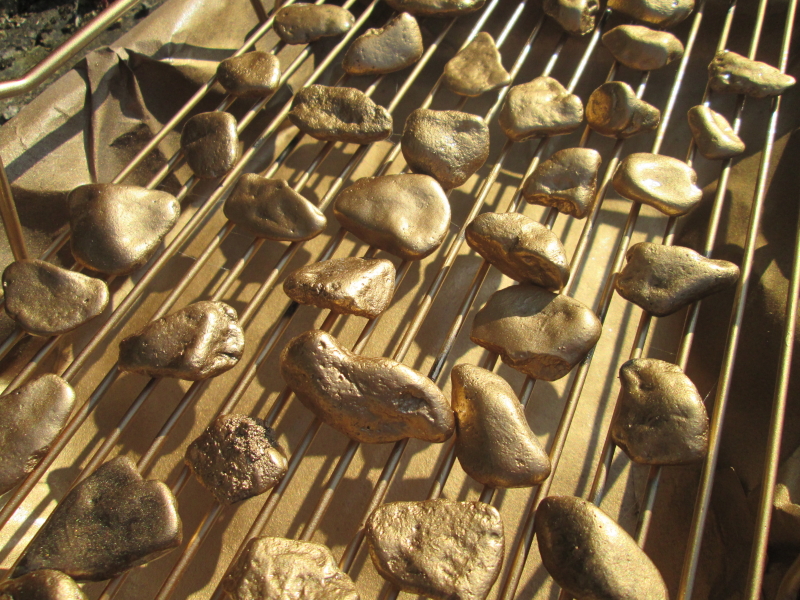
Gold Nuggets
We needed some 'treasure' for
our messy games day. These 'gold nuggets' started life as gravel which
were then painted first with black spray paint, followed by gold spray
paint and finished off with clear varnish.
'Gold' Nuggets
Built Aug 2021
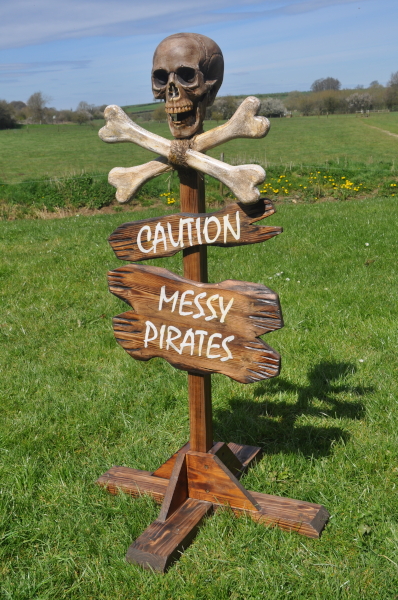
Messy Pirates Sign
Finished Messy Pirates Sign
Built for
our annual messy games day, Messtival, this sign was constructed of
various offcusts of timber and a basic plastic skull bought on ebay.
The bones were made from some thick chipboard,cut on the bandsaw and with roundovers made on the router.
The
signs were offcuts of pine, again cut on the bandsaw and details carved
with gouges. Lettering was created by cutting stencils on the vinyl
cuttter and then applying paint.
All the timber was distressed by
'flame ageing', lightly charing the wood with a gas blowtorch. A very
quick pass over, lightly burns the grain pattern. Once a stain has been
applied it looks somewhat aged.
The bones and skull were aged by dry
brushing with a combination of dark colour acrylics along with a bit of
yellow on the teeth, and the skull mounted on the post.
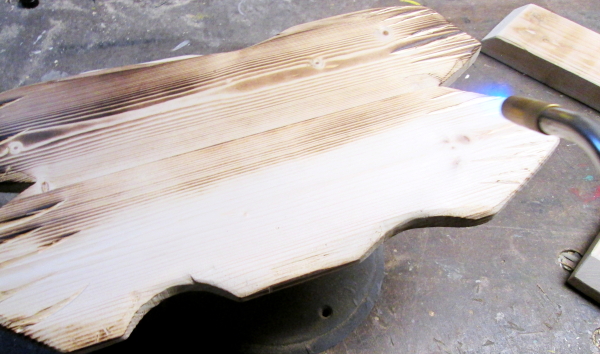 Flame Ageing the Wood
Built April 2021
12V Power Supply
Unregulated
12V power supply built from a lighting transformer and other salvaged
parts to power up the colour light railway signal.
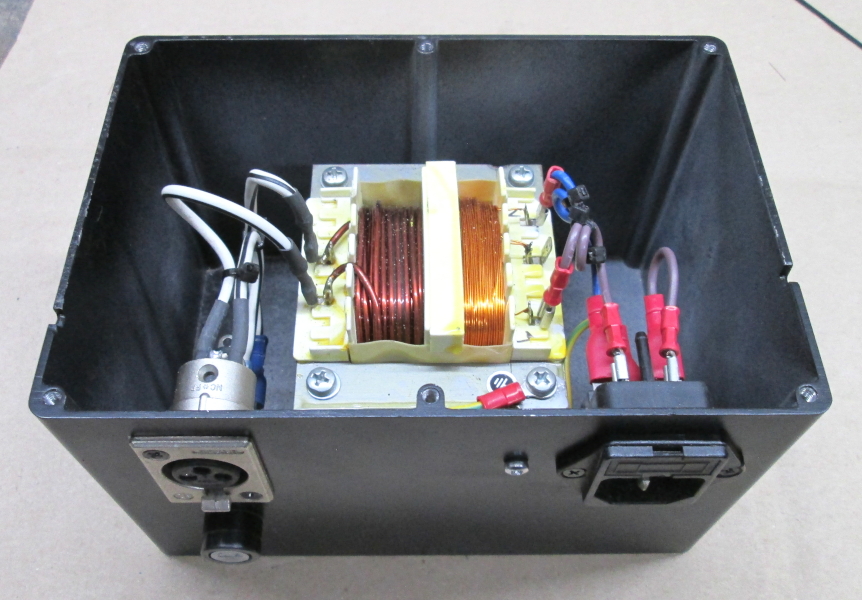 12V AC Power Supply
Built Mar 21
Printers Mitre Trimmer Restoration
This
is a mitre trimmer intended for trimming printing type, rules and
borders to precise lengths and to cut angles for mitring. This was very
dirty and stiff but complete with light surface rust when I obtained
it. It therefore didn't need a lot of work to bring it back to usable
condition and mount it on an offcut of oak as a base. Last thing was to
resharpen the blade- it now cuts really well.
Built Mar 2021
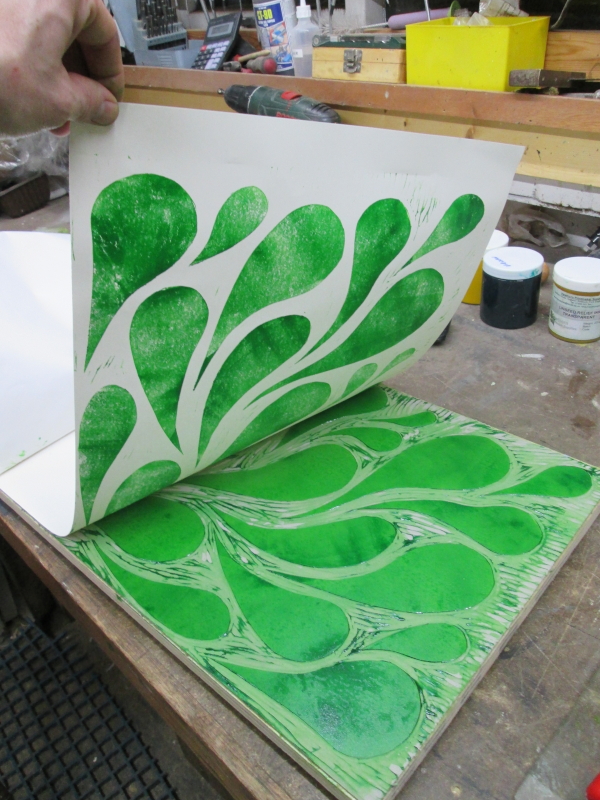
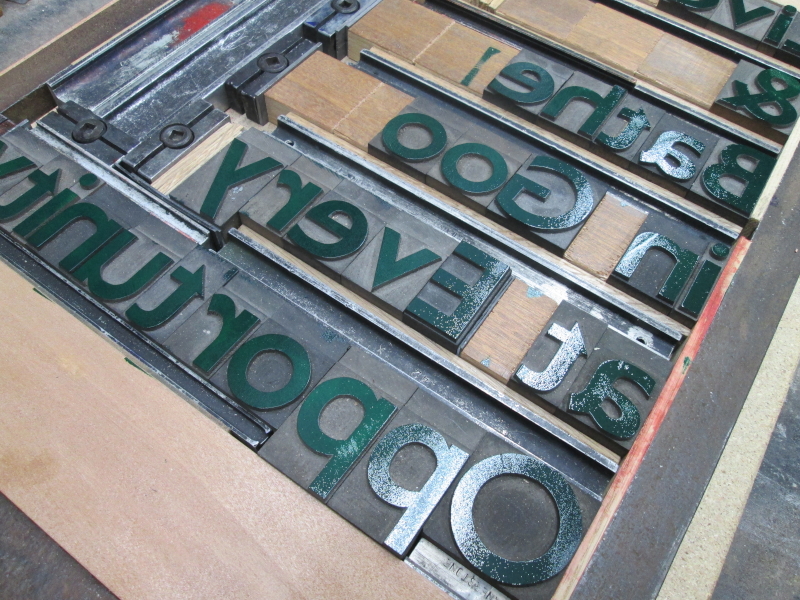
Goo Poster
Poster produced in two stages by creating lino print and then over printing with darker green using vintage wood type.
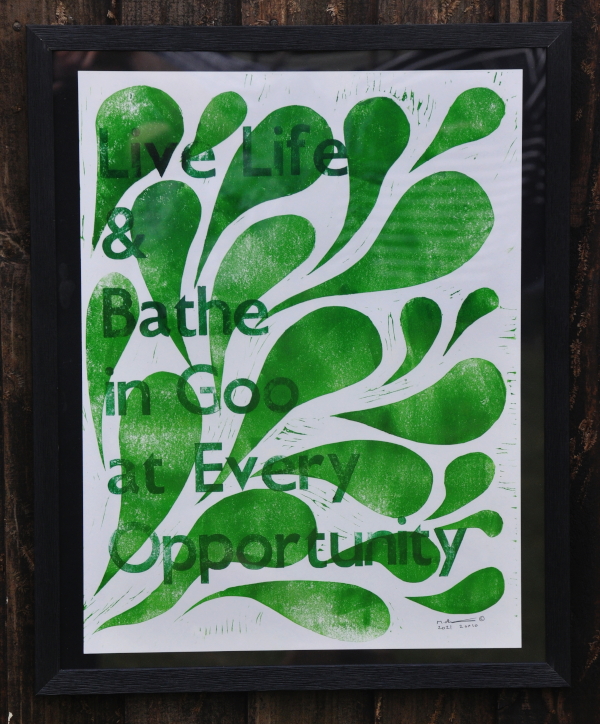 Finished Poster
Lino & Wood Type
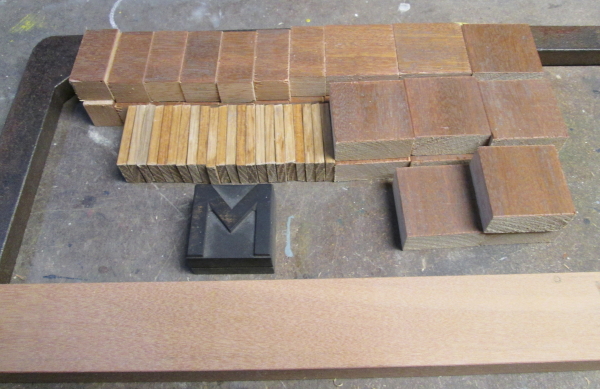 Print Spacing material
 Built Feb 21
Booklets
My
daughter loves writing and illustrating short stories. I made these for
her from copier paper and coloured card for the covers.
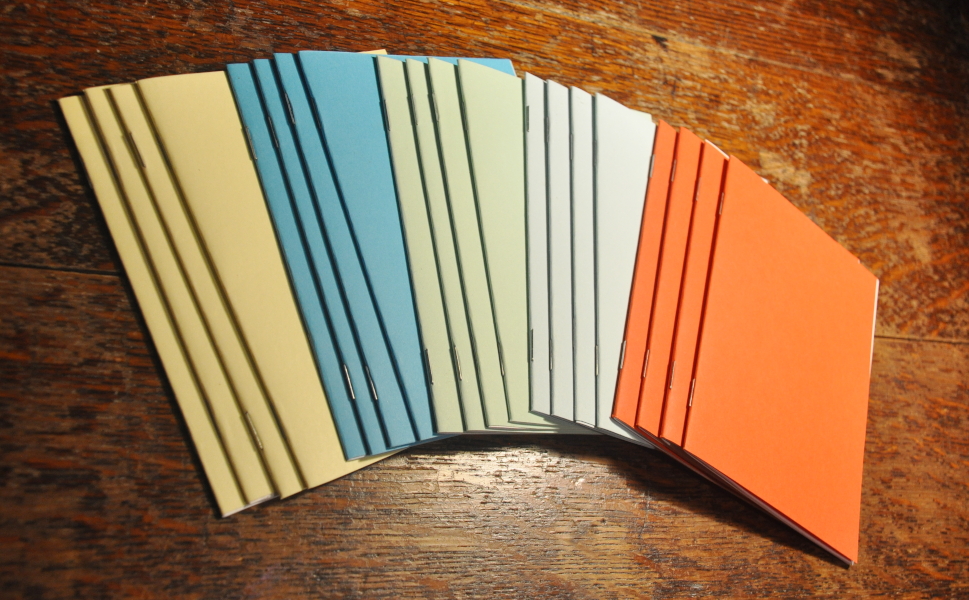 Story Booklets
Made Jan 21
Welly Rack
A basic rack built as a christmas present for friends.
 Wellington Boot Rack
Built Jan 21
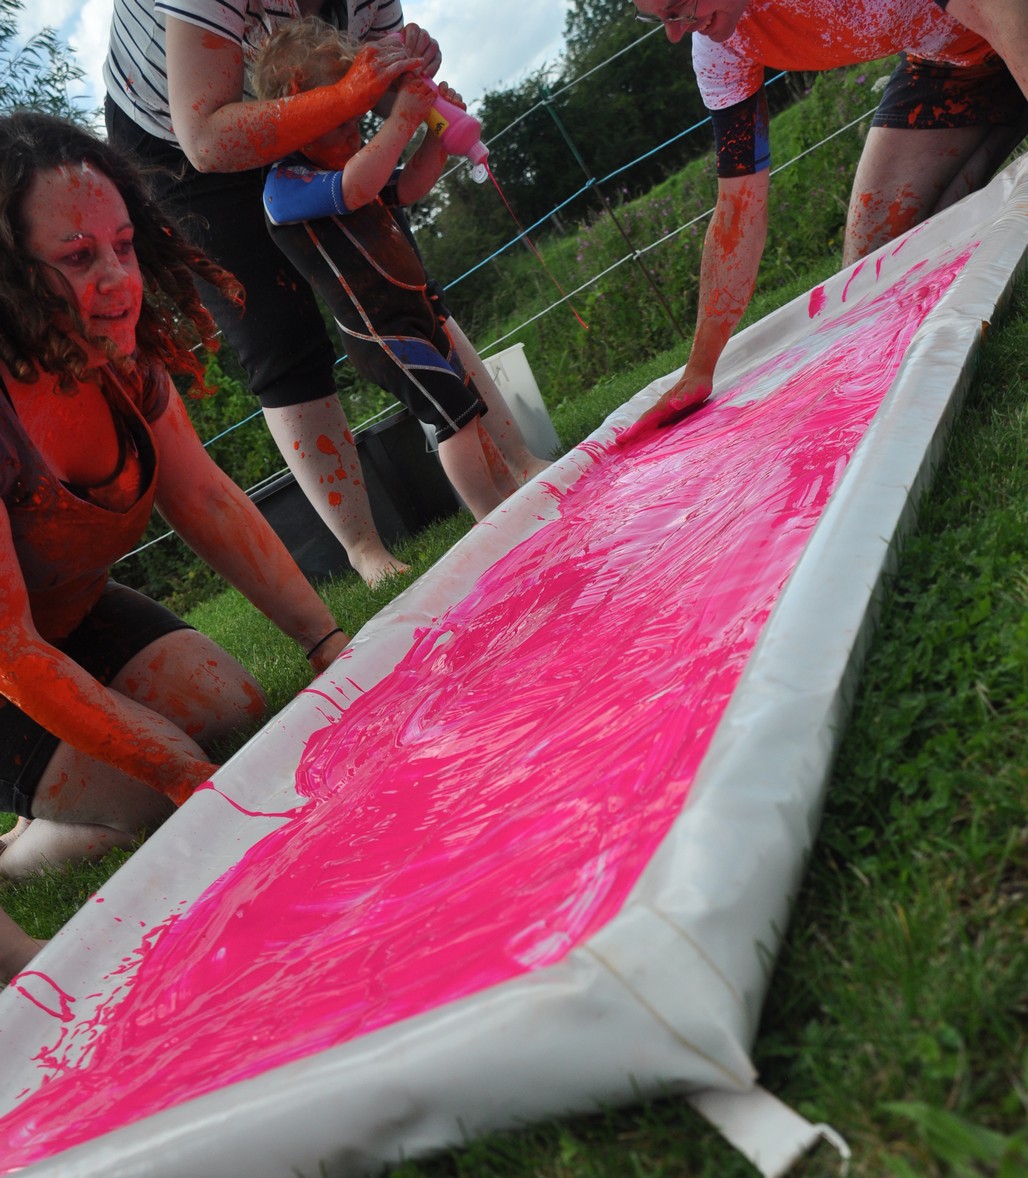
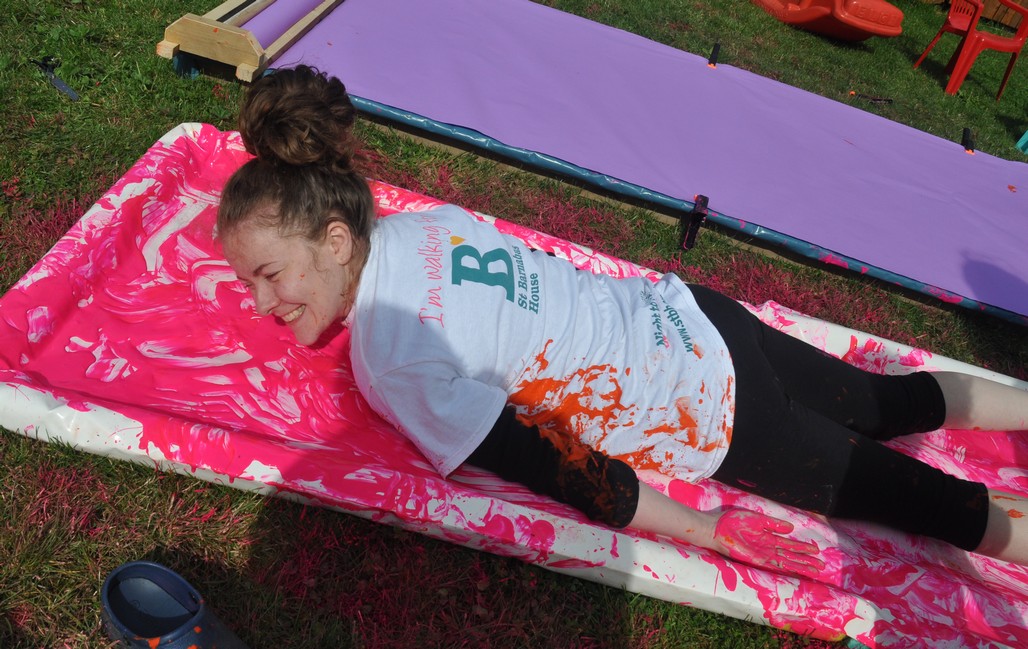
Shallow Pool
I
built this shallow pool for use in some of our messy games. Initially
it was intended to be used as part of an obstacle- able to be used to
hold gunge under a net, but also has been used for making paint angels. The material is a heavyweight PVC cloth, cut
from an old marquee side found at the local recycling centre. This was
glued up, leaving pockets down each side and at the ends to insert pool
noodles. Pool noodles were glued together at the ends
to form corners.
The
adhesive is similar to that used for manufacture and repair of
inflatable boats- in this case Bondrite P1002 PU PVC/ABS adhesive.
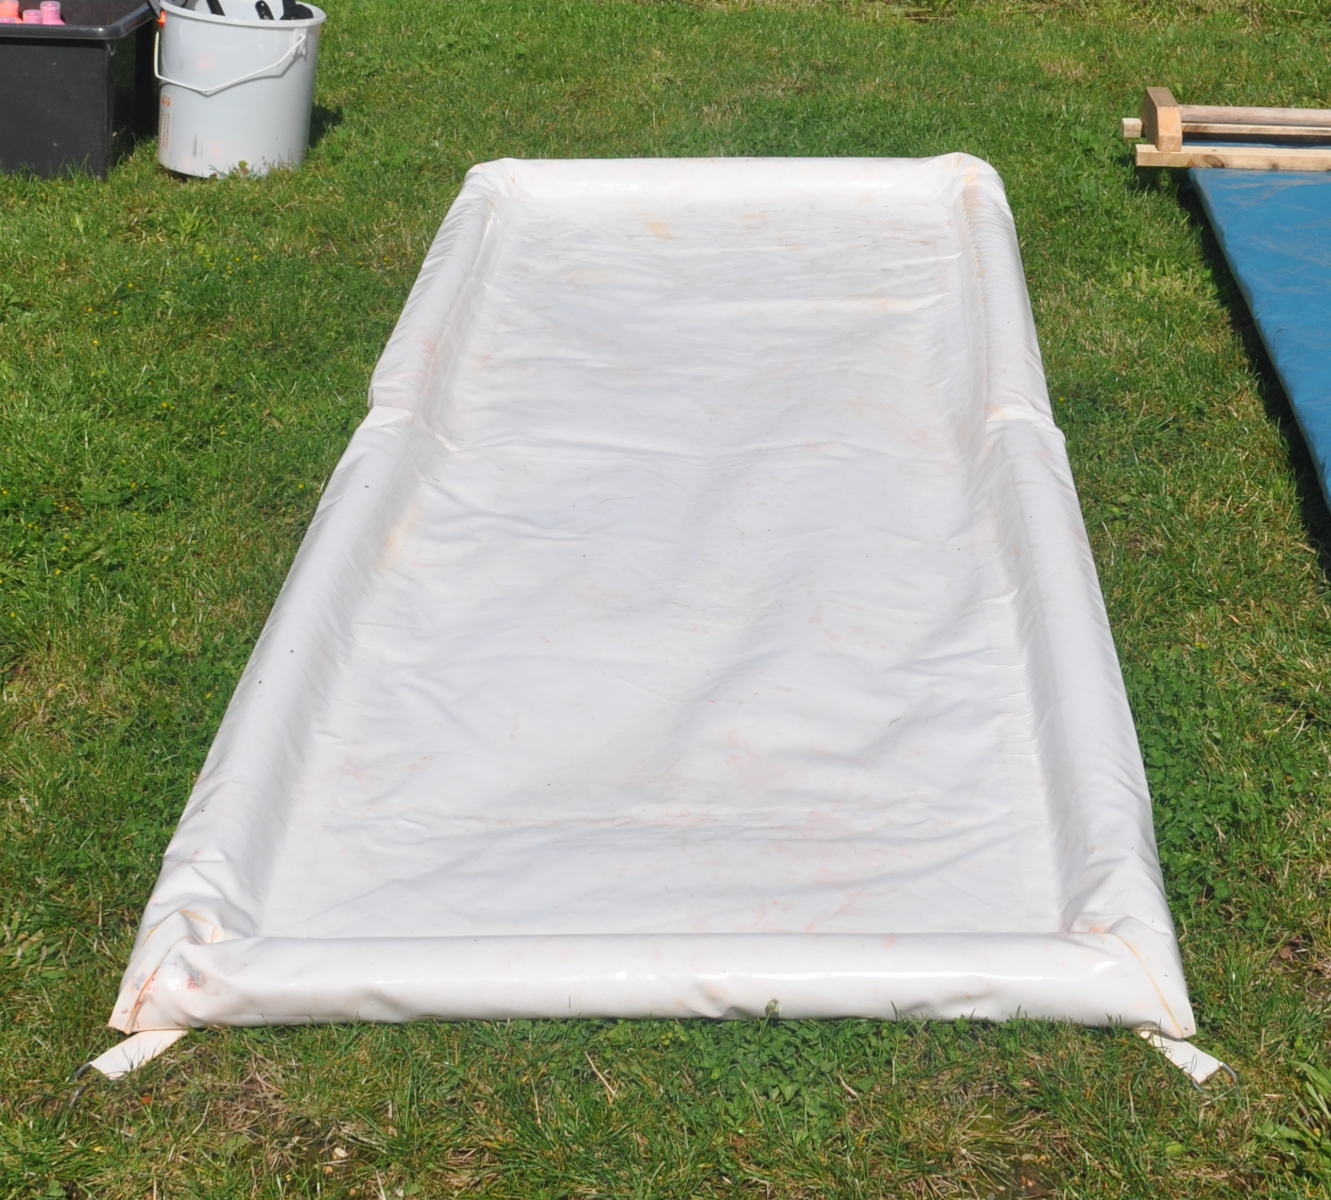 Completed Pool
The Pool in Use- Making Paint Angels
 Pool Noodles To Form Structure
May 2020
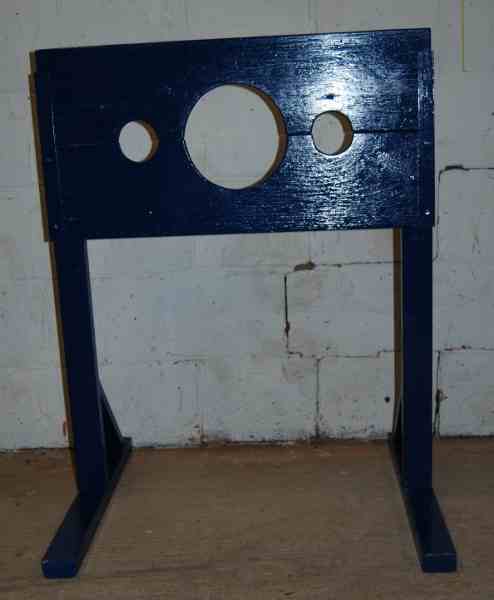
Play Control Panel
This
is a panel I recently made for my daughters for make believe play- It
was a rocket, a train, an aeroplane and a theatre lighting desk in the
first couple of days. The large panel came out of a scrap aircraft
pitot-static calibration unit. Most parts were stripped down as they
were largely pneumatic, and replaced with switches, knobs and other
pieces, mostly salvaged from other equipment, from my junk stores. A
second panel was made from scratch as I wanted to add a joystick. This
started life as a 19" rack panel from the scrapyard which happened to
be in a very similar colour, to which I added some switches and a
joystick from a scrapped arcade machine.
All of this is mounted in a sloping box made from scrap ply and hardwood strips and painted black.
I
found a Nasa sticker to adorn the front, and will probably add a few
more labels, especially on the smaller panel. I'll probably also wire
it up to have some functions.
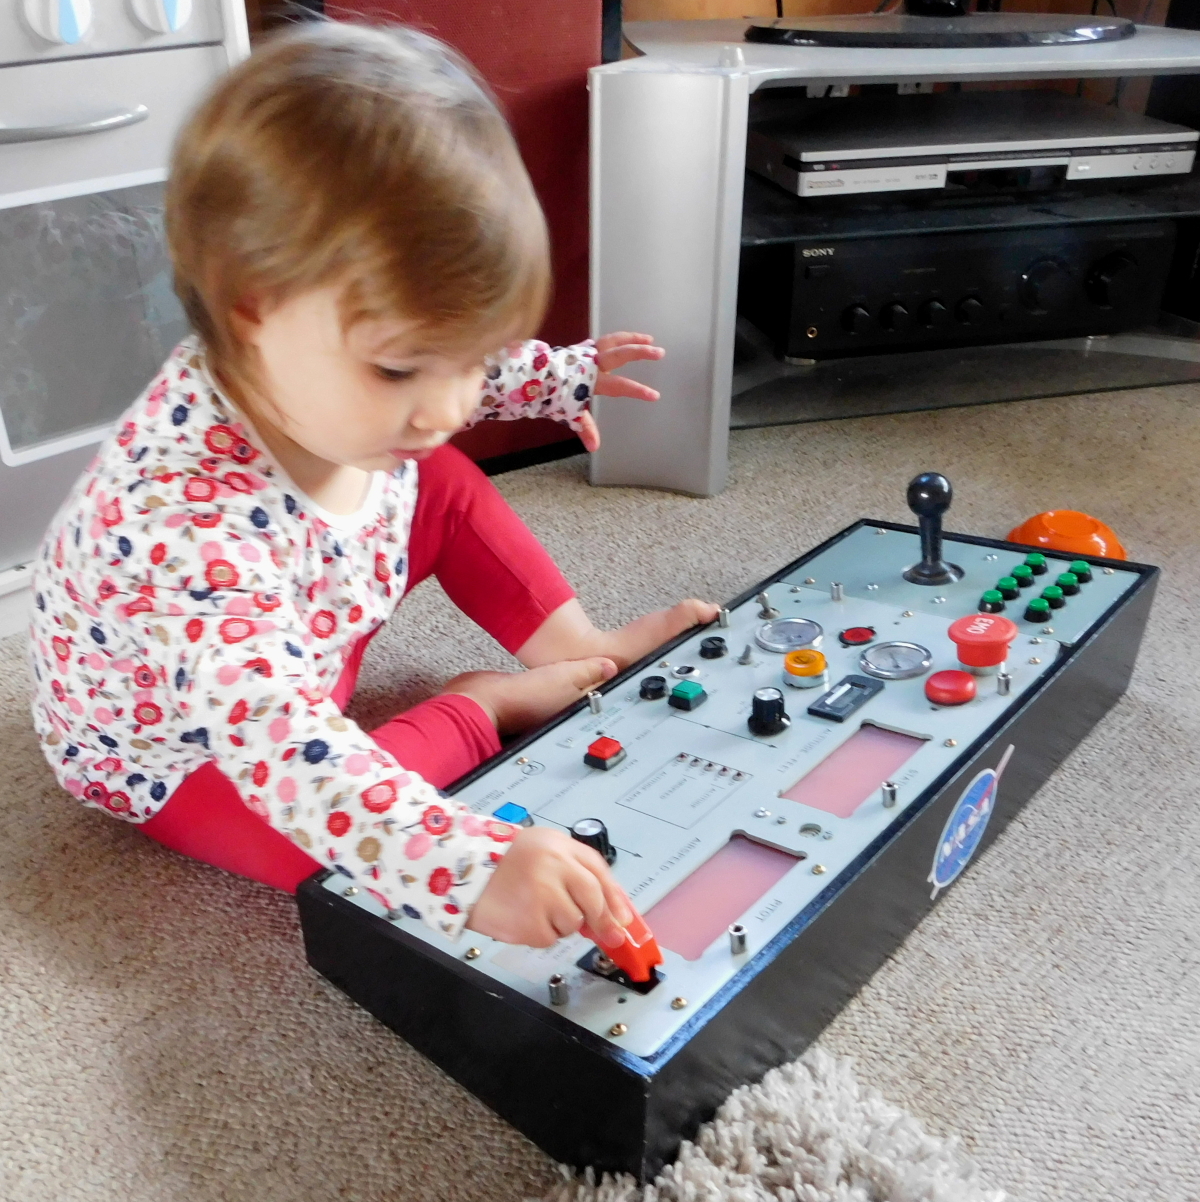
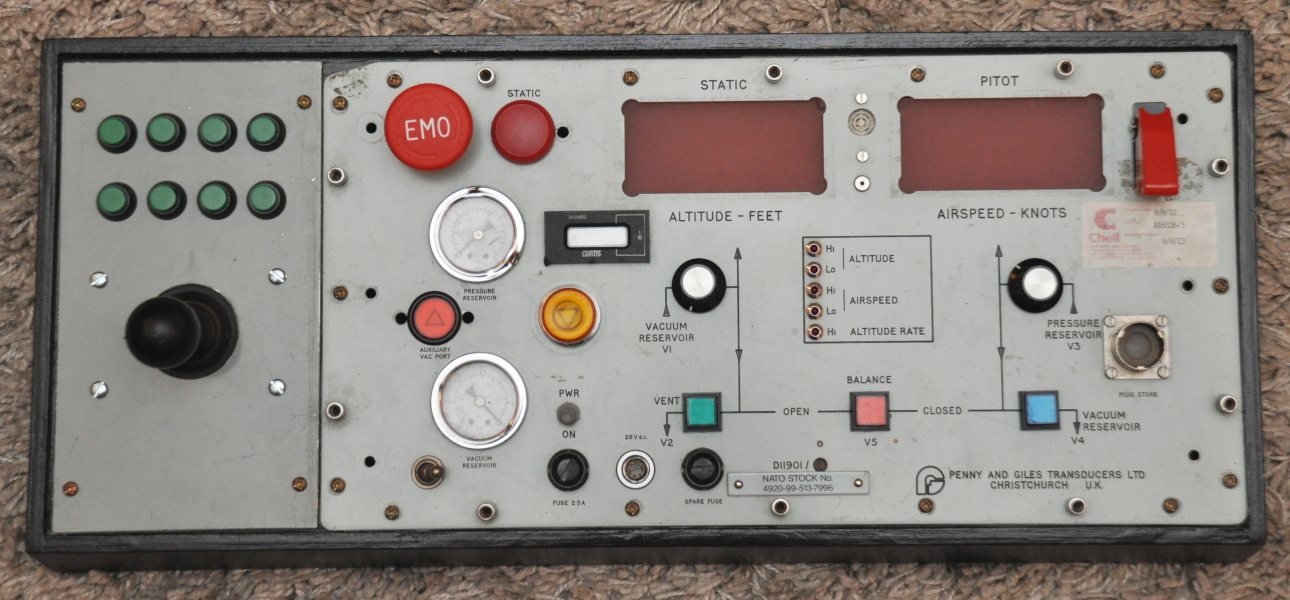 Play Control Panel
April 2020
M
Repainted sign originally made for our wedding. Painted in red UV reactive/ flourescent paint. Sign approximately 1m tall.
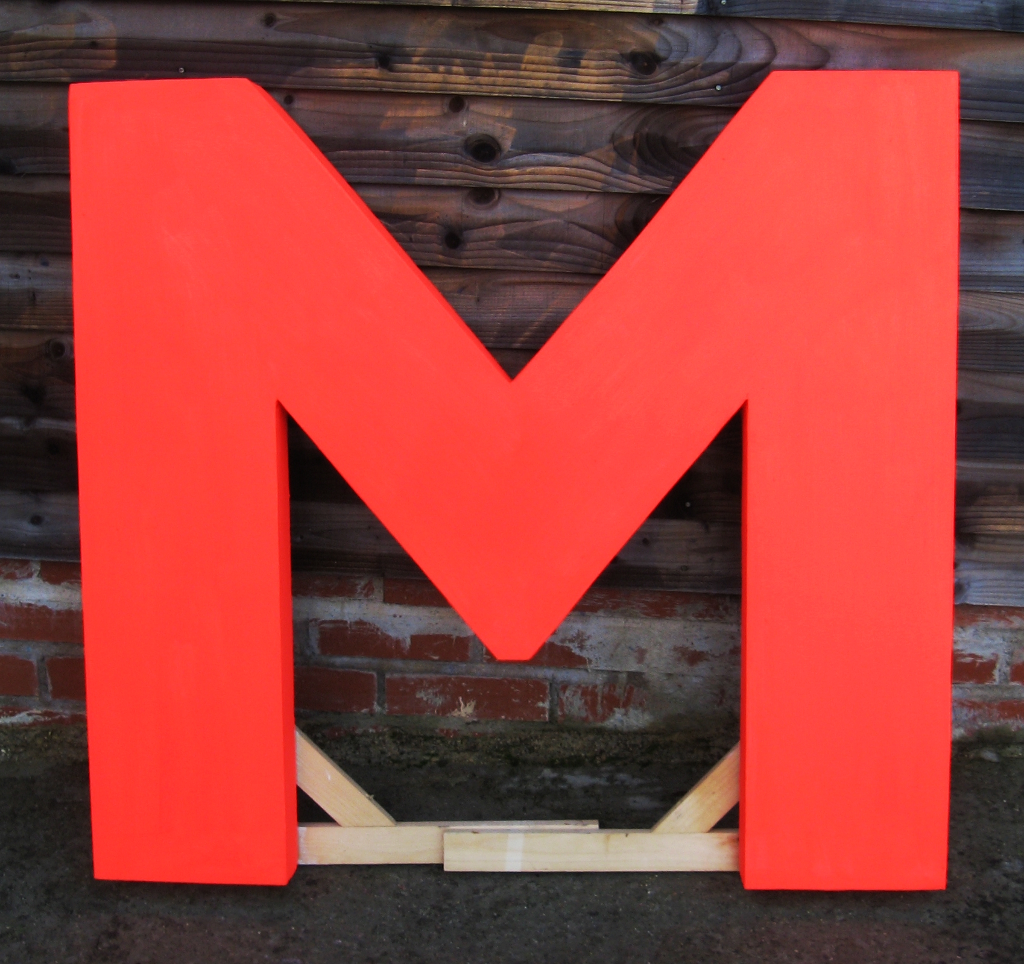 M Sign
September 2019
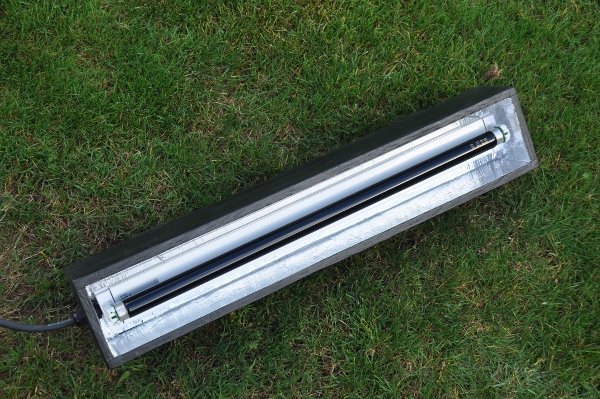
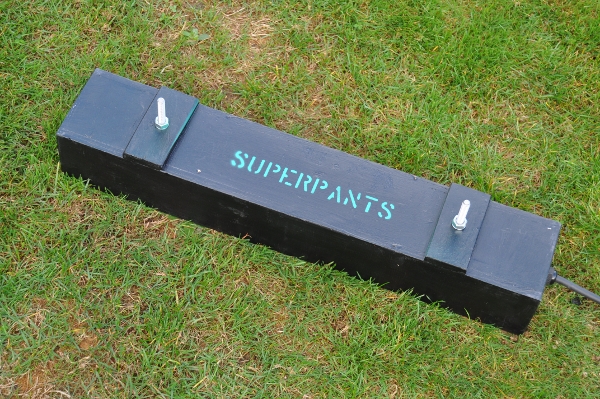
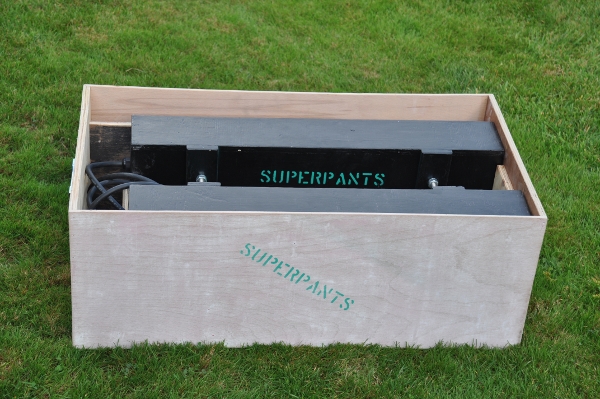
Superpants Sign
Sign for the workshop made from Yellow EVA floor mat and scrap ply
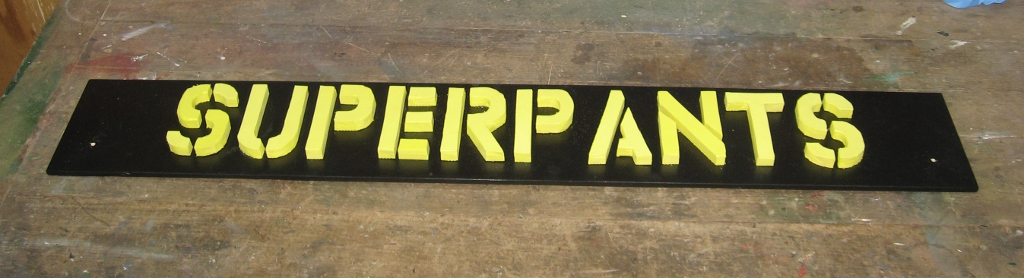 Superpants Sign
September 2019
Flourescent Backdrops
Backdrops for a party made out of black weed fabric splatter painted with UV reactive flourescent paint.
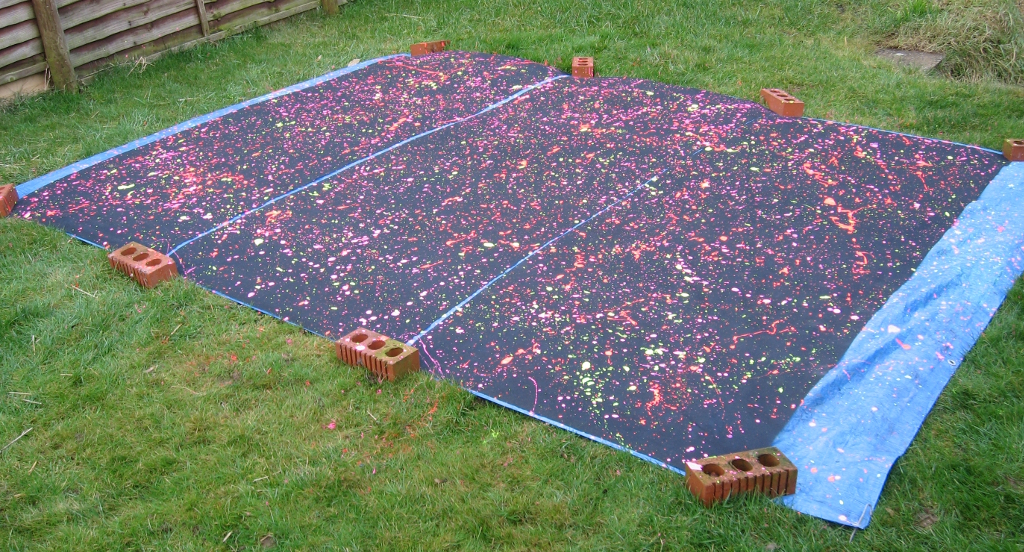 Flourescent Backdrops
September 2019
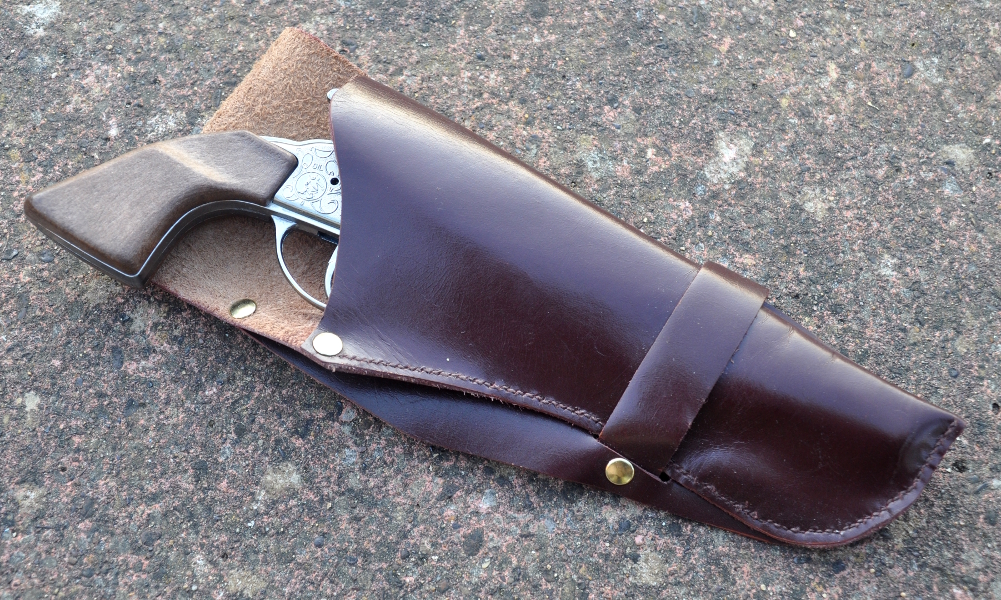
Pistol HolsterA
friend was having a wild west themed birthday party- this seemed to be
an ideal oppurtunity to try out some leatherwork and make a holster. As
this was my first attempt at serious leatherwork (other than a belt) it
doesn't hold up to close scrutiny but is functional and I learnt a lot.
The leather came from the local recycling centre a coupke of years ago
and had been sat on the shelf waiting for a suitable project. The gun
is a large Gonher toy cap gun.
I created the pattern from scratch using thin card, based of images of wild west era holsters.
July 2019
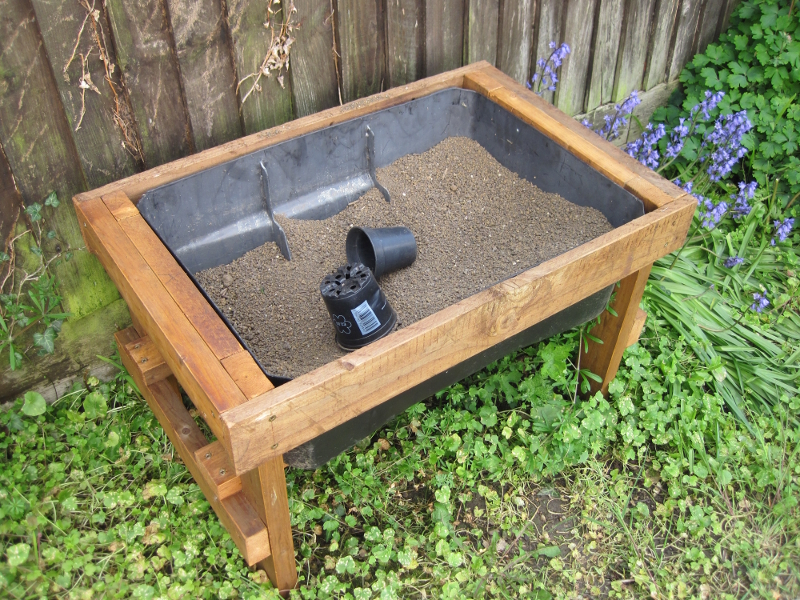
Digging Box
I built this simple box for our eldest daughter to use for digging in the garden. It's built with scrap timber bought from Northamptonshire Wood Recycling
and uses a cut down loft cold tank as the container. When not in use
it's covered with a lid made from polycarbonate conservatory roofing.
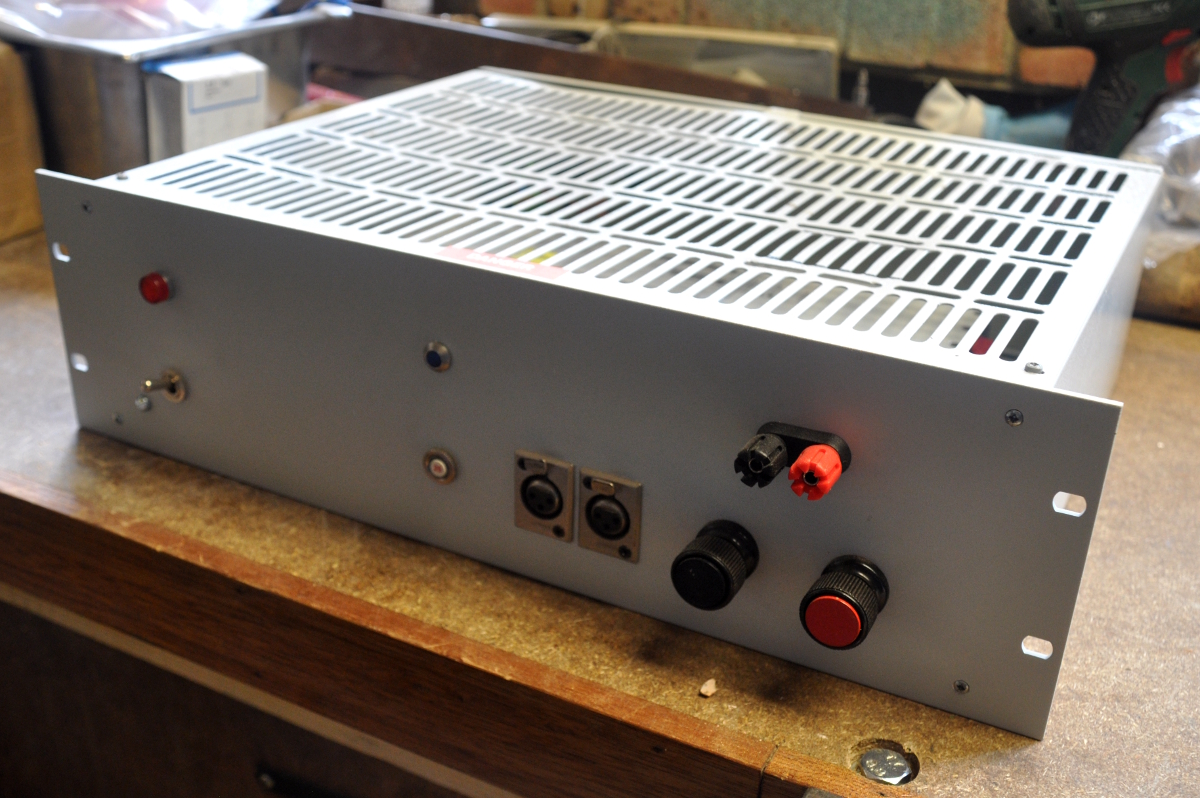
24V Power Supply
This power supply was built as a general workshop 24V unit
to go alongside a 12V PSU and a variable PSU I already owned.
The build was primarily an assembly from other, largely
scrap components. The power supply module was removed from a barely used piece
of semiconductor processing equipment found in a scrapyard. It is a really good
quality TDK Lambda module rated at 600W, so around 25A at 24V. The case was
recovered from another old piece of test equipment, with panels re-made from
other scrap materials
The remainder of the components; 4mm terminals, neon, LED
indicator, switches etc were all recovered from other scrap or surplus
equipment, the only new item being the circuit breaker.
Sept 2018
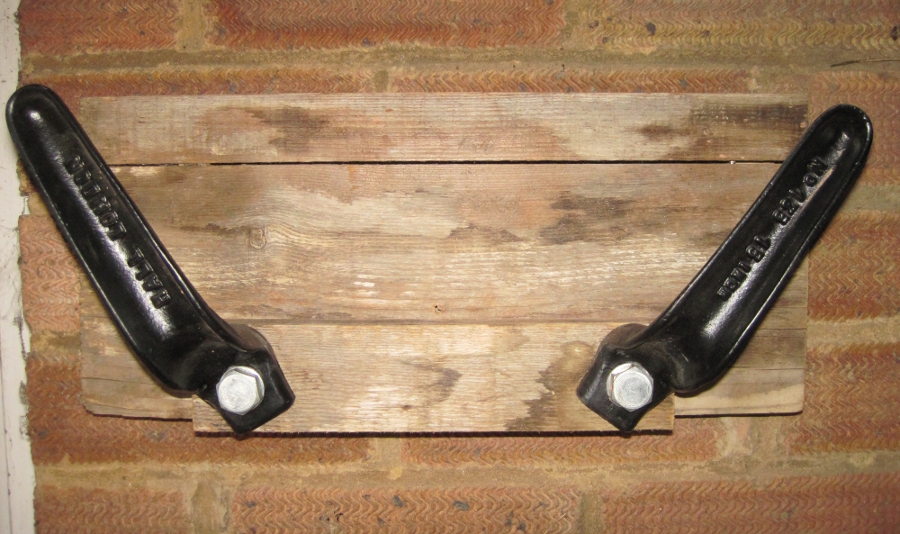
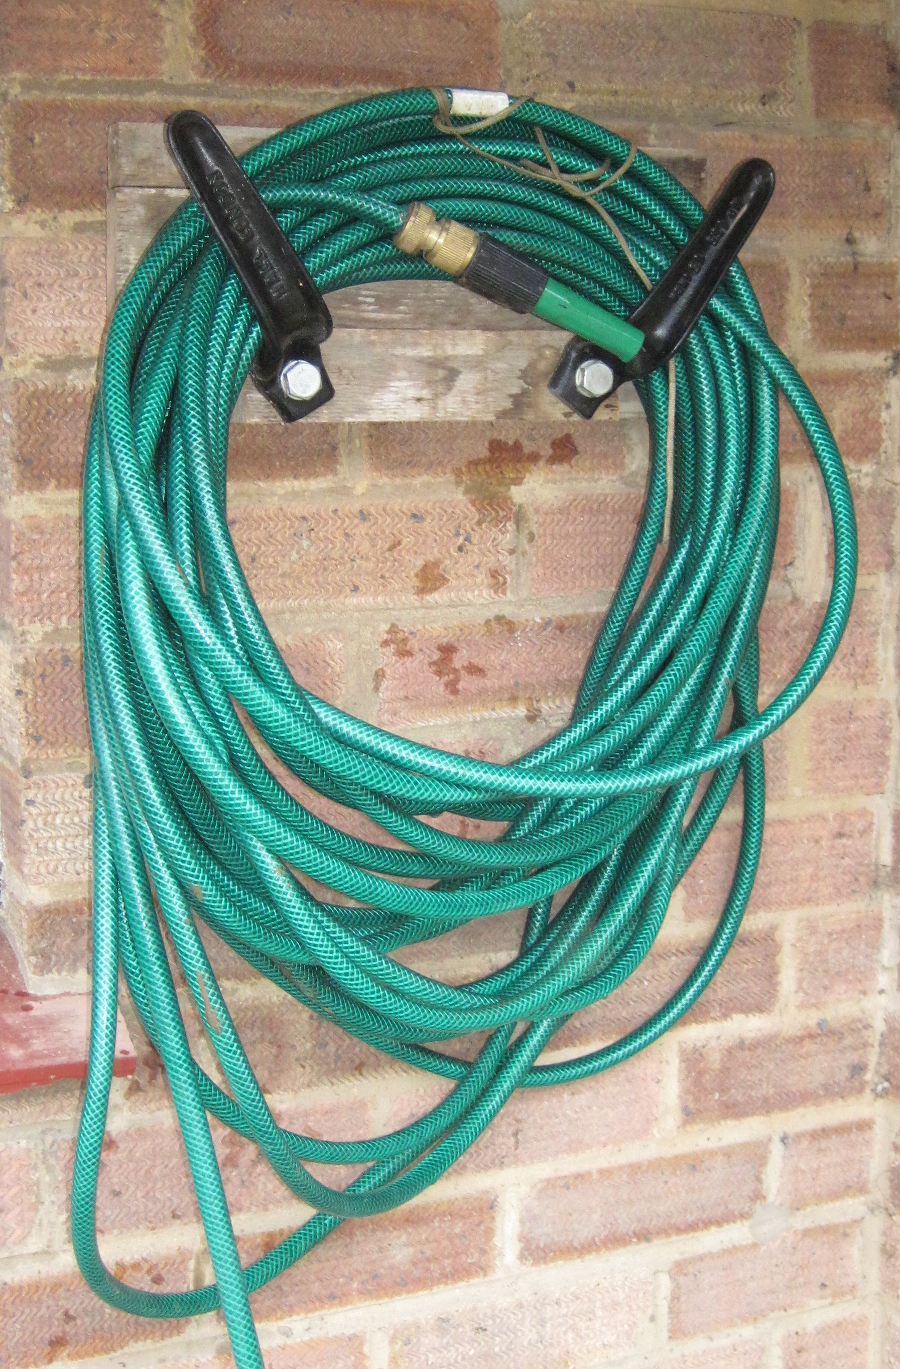
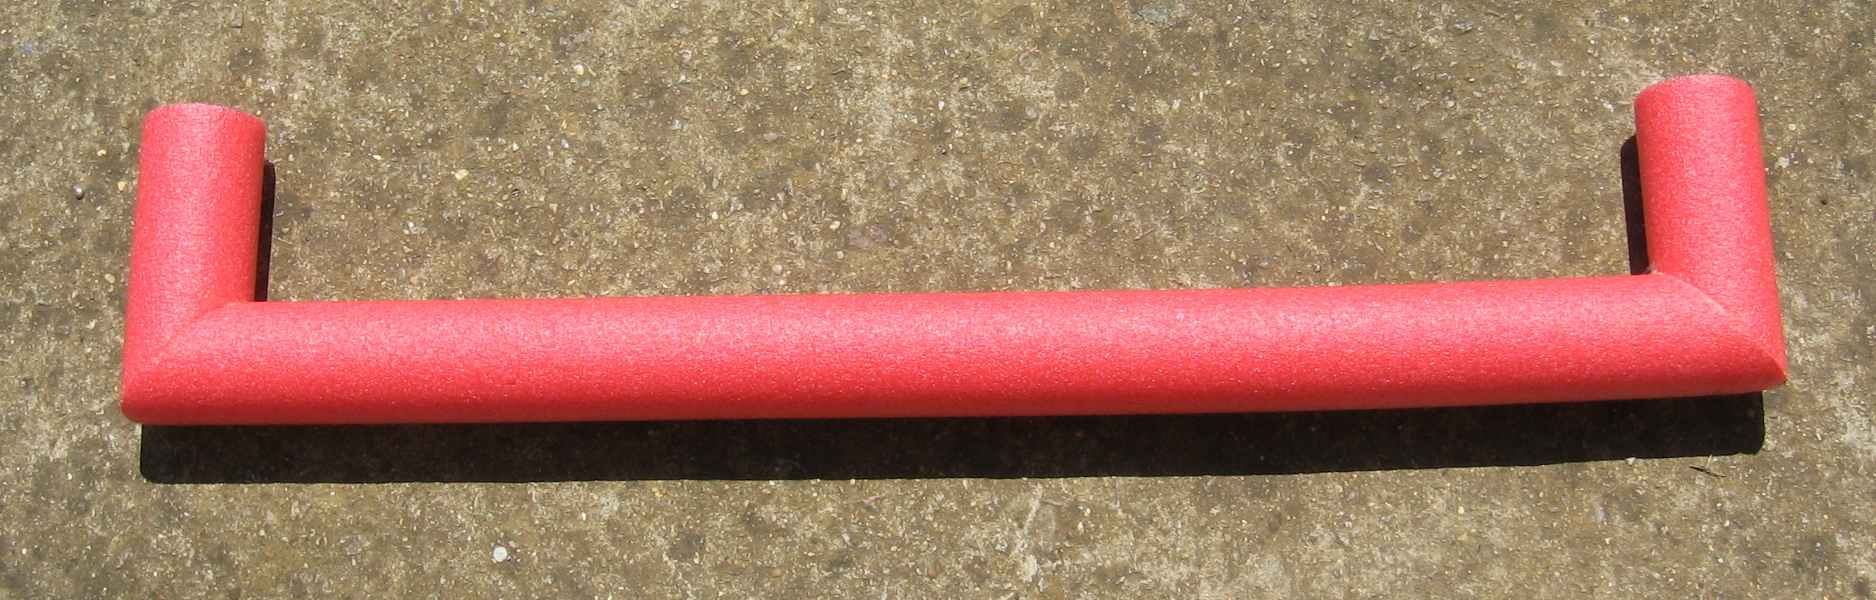
Hose Rack
Rack
for the garden hose made from a large olde cleat that was used in the
Guildford Civic Hall before it's demolition for rigging set from.
Jan 2018
Wheeled Trunk
I made a pair of these trunks to hold cable and hoses. Made from 12mm ply, with castors salvaged from computer racks.
Jan 2018
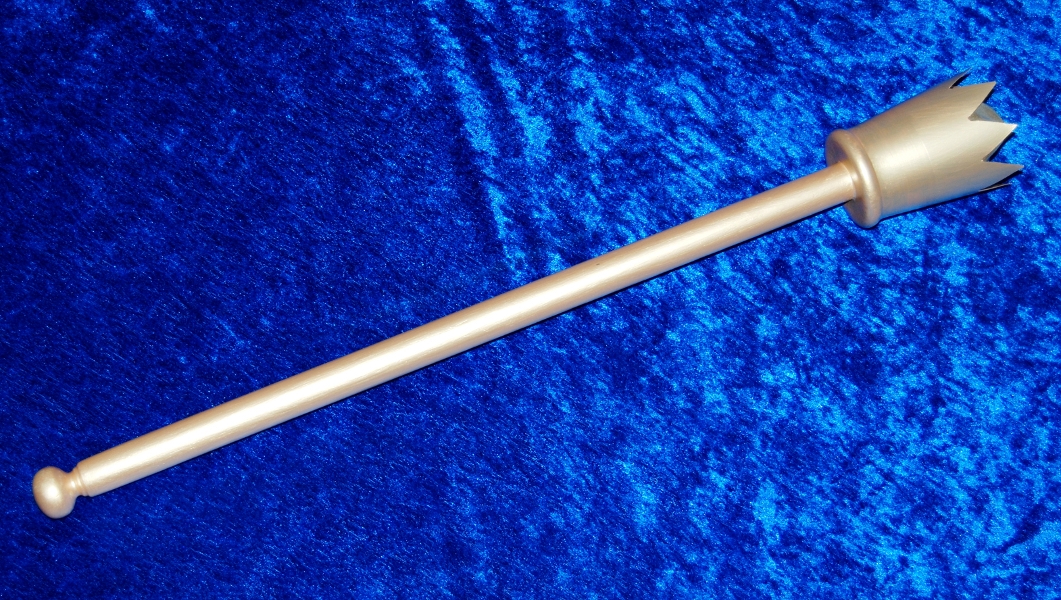
Where The Wild Things Are
Some photos of a replica staff from the film, Where the Wild Things Are, used as part of a fancy dress costume.
Jan 2018
Shoe Rack
I
made this shoe rack to fit in a space behind the door in our utility
room. Made from softwood strip, with broom handles for the shoes to sit
on. The top is a seat.
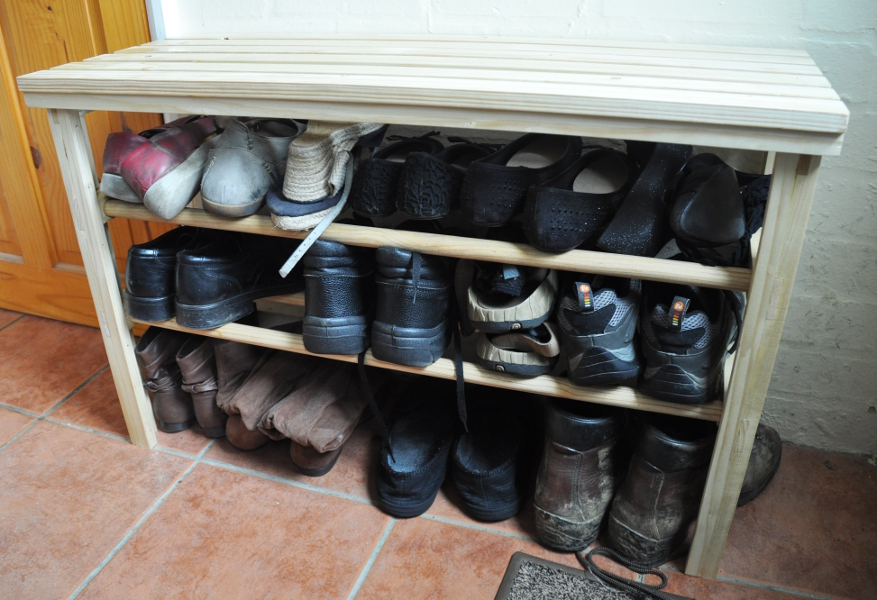 Shoe rack in use
May 2017
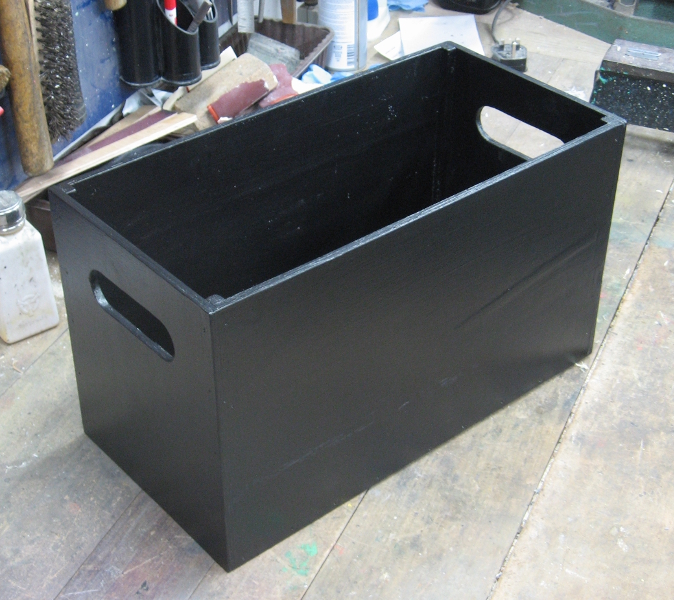
Wooden Box
A wooden storage box made from some scrap packing case plywood.
March 2017
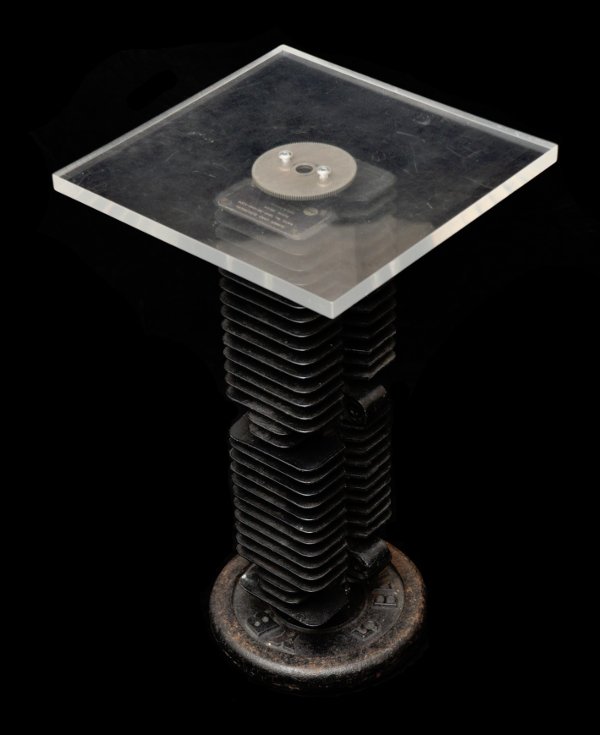
Occasional Table
I
made this table for my wife in afternoon whilst off on paternity leave.
My wife needed a small table for a few items next to her feeding chair,
so I made this from scrap items I had around in the workshop. The base
is a 5kg barbell salvaged from a skip, and the acrylic top was
recovered from a piece of lab equipment also pulled out of a skip. The
upright is a dummy load salvaged out of a piece of test equipment
bought cheaply on ebay that I'd originally intended to use as part of a
lamp. The whole lot is fixed together with surplus nuts and bolts.
Nov 2016
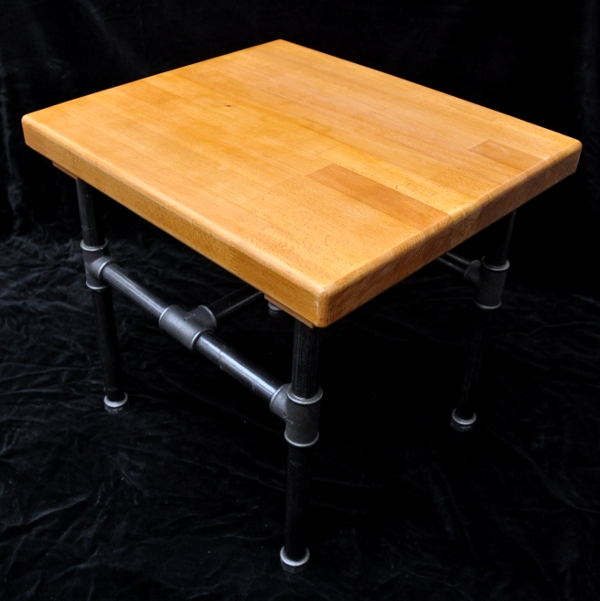
Coffee Table
This is a coffee table made for our living room, replacing an earlier table I made from chequer plate.
The
top is an offcut of beech worktop left over from decorating our utility
room. The edges were rounded over using the router and finished with
french polish. The legs are made from 3/4" steel pipe, and joined with
black malleable iron pipe fittings. These were cleaned down and
finished with wax. The top and legs are fixed together via blocks of
beech salvaged from a sofa.
Nov 2016
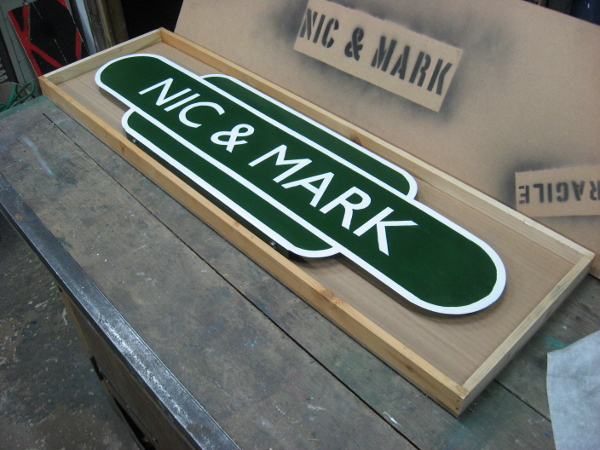
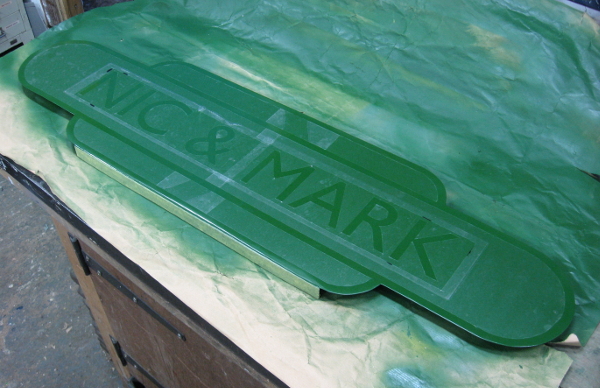
Totem SignOne
of my very good friends was to get married in the waiting room of the
Bluebell railway, a preserved line in Sussex. I decided that a good
wedding present would be to make a sign based on the design classic of
a British Railways totem with the happy couples names. I
started off by searching for details of the original signs to base my
design on, and succeeded in finding some very useful scans of old BR
documents on Flickr: BR Livery
. Using these I was able to create some templates in CAD to help with
the layout and to be able to cut stencils to use for the painting. I
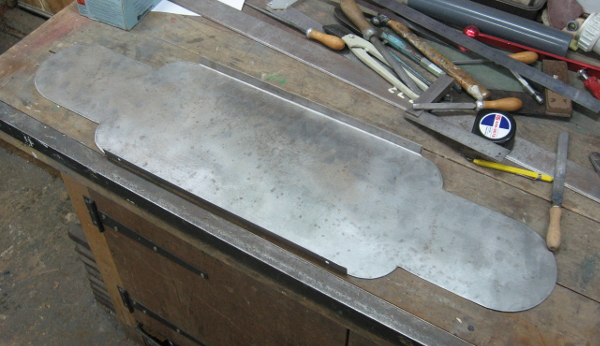
used Gill Sans as the font.The sign was made from a piece of
steel, rescued from the scrapyard and stiffened up with a couple of
channel sections also folded from the sheet bonded to the back. A
bracket was also made to enable it to be fixed to a wall. The finished sign in it's crate ready to be given to my friends
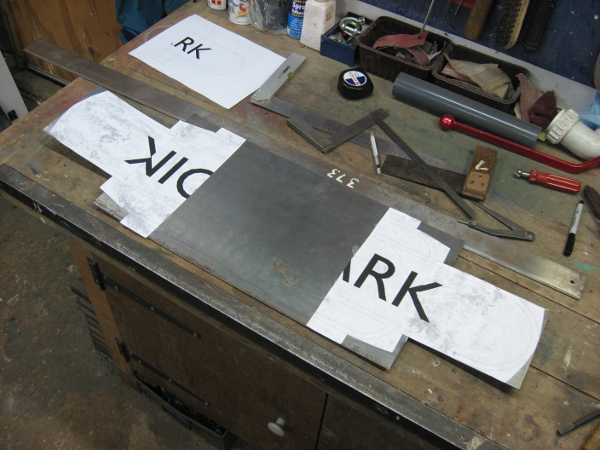
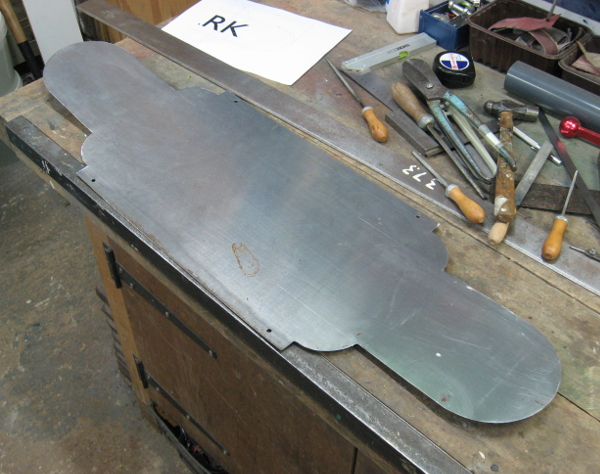
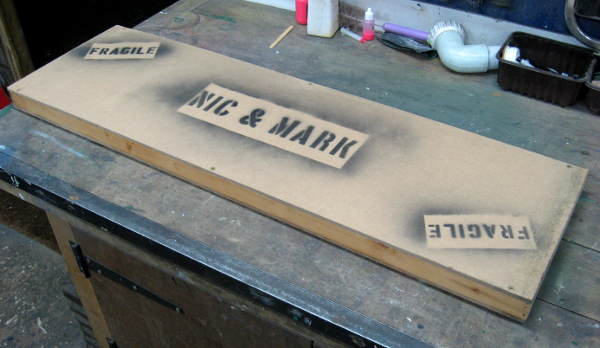
The blank being prepared- using templates generated in CAD- Cut to size on a guillotine, shaped with tin snips and holes drilled
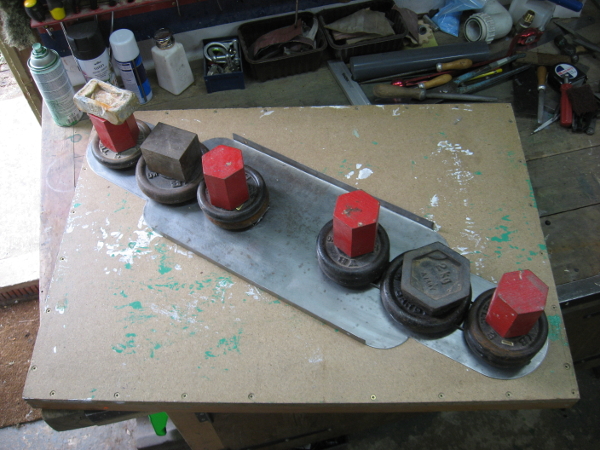
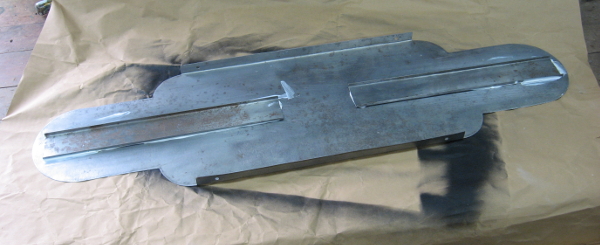
Edges folded up and channels bonded to the back to stiffen up the wings
Channels bonded on- blank finished ready for paint
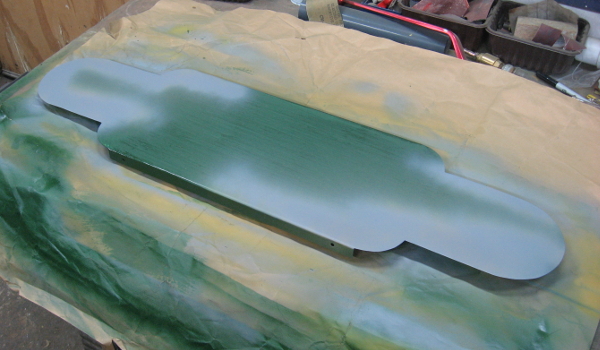
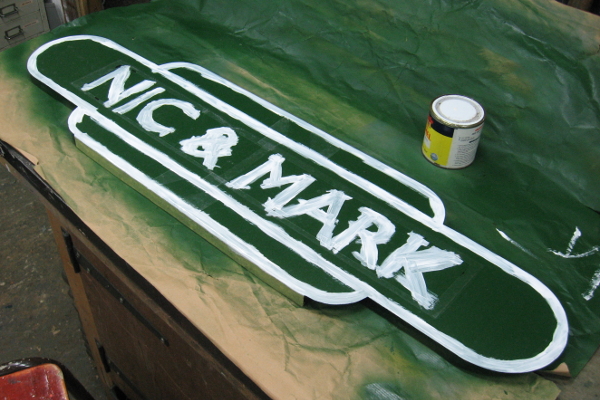
The sign in the process of being painted
Stencils were hand cut to the design created in CAD, in Gill Sans. The letters and borders were painted in white paint.
Once I had lacquered the sign it was packed into a custom made crateSept 2016
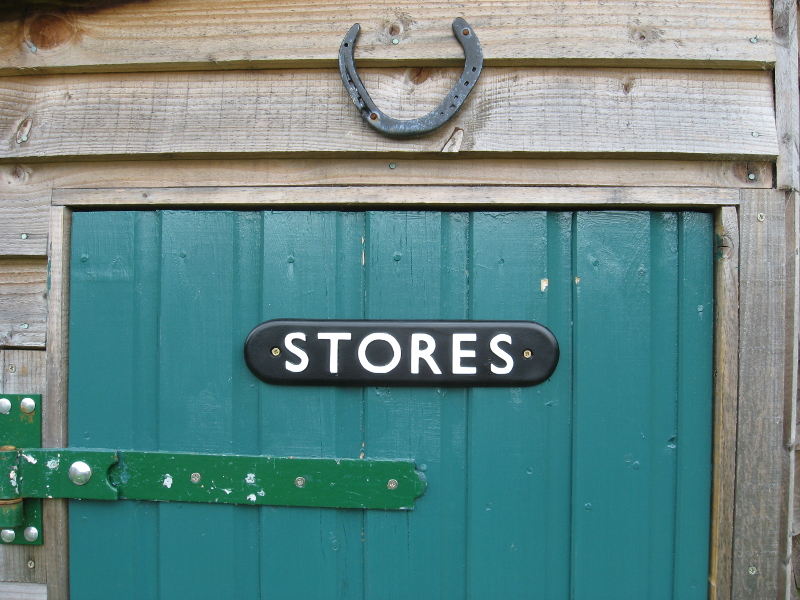
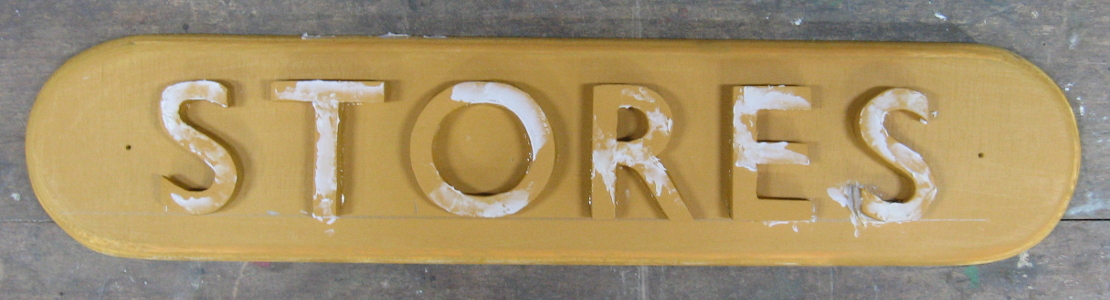
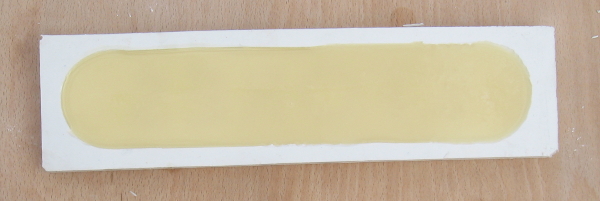
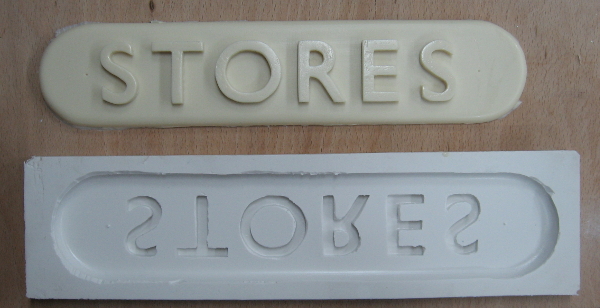
A stores sign made for my second shed- Based loosely on cast iron British Railway signs
Letters cut from MDF, glued to a piece of ply, primed, filled and sanded. Painted and fixed in a frame
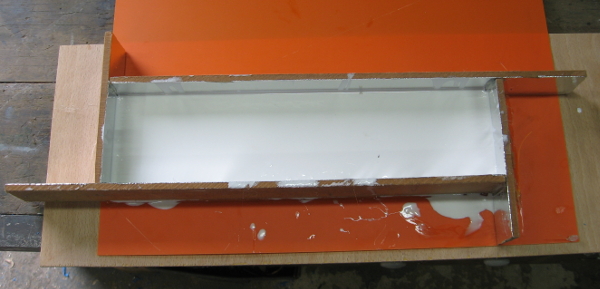
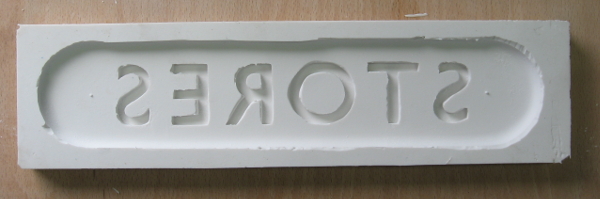
Silicone negative mould cast
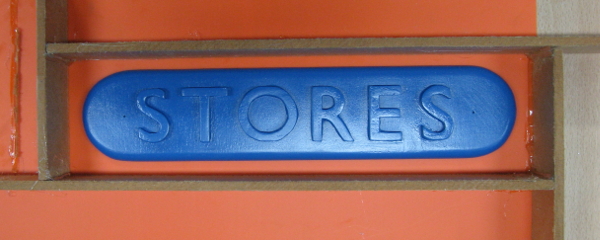
Sign cast in marble filled polyurethane
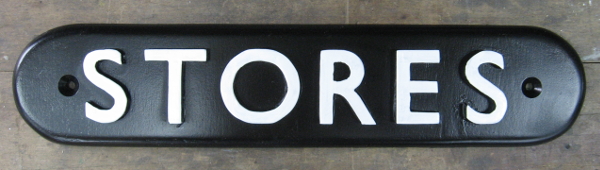 Sanded, mounting holes drilled and painted
August 2016
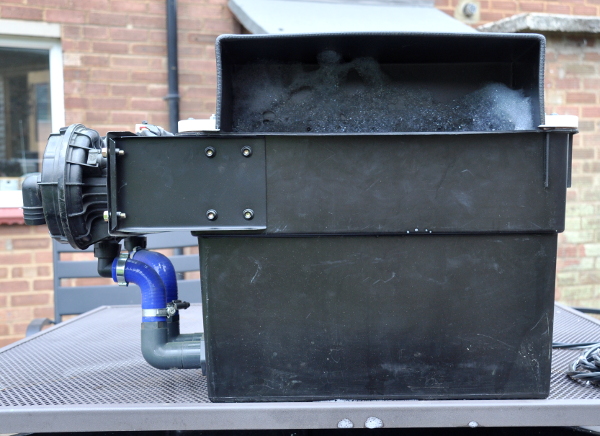
Foam
machine custom built to fit in an existing gunge tank. Air is provided
by two 'secondary air pump' blowers from a BMW series 3. Tank is a 25
litre central heating header tank.
July 2016
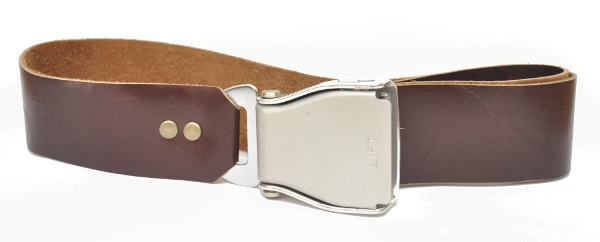
One
of a pair of belts made from a scrap aircraft lap belt. The leather was
from a half hide I found cheaply in our local recycling centre.
May 2016
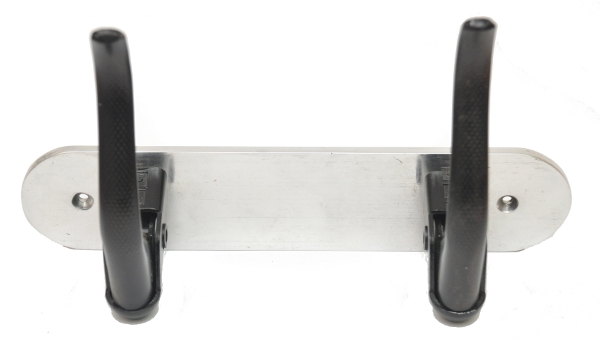
Another
set of coat hooks made from bike brake levers. This time I cut the back
at an angle so they hooks sit better and I chose to paint the
handles black.
May 2016
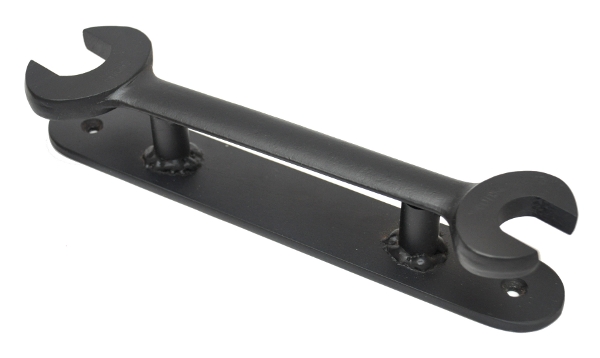
I
recently made this door handle to go on the workshop door from a scrap
spanner found at a boot fair and a couple of pieces of steel that had
come from the scrapyard. This was my first proper project, albeit a
small one using my new welder, a UK made Portamig 236, which I am very
happy with. I will soon put up a new page with more 'upcycled' projects
with more detail on how to make them.
May 2016
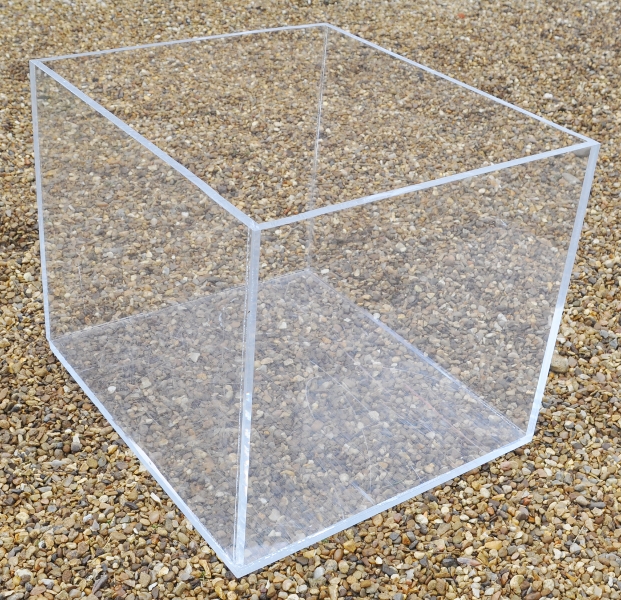
This
acrylic tank was the base of a scrap display stand, manufactured from
10mm thick acrylic, solvent welded together. I cut it down to be able
to use it as a tank for games.
Mar 2016
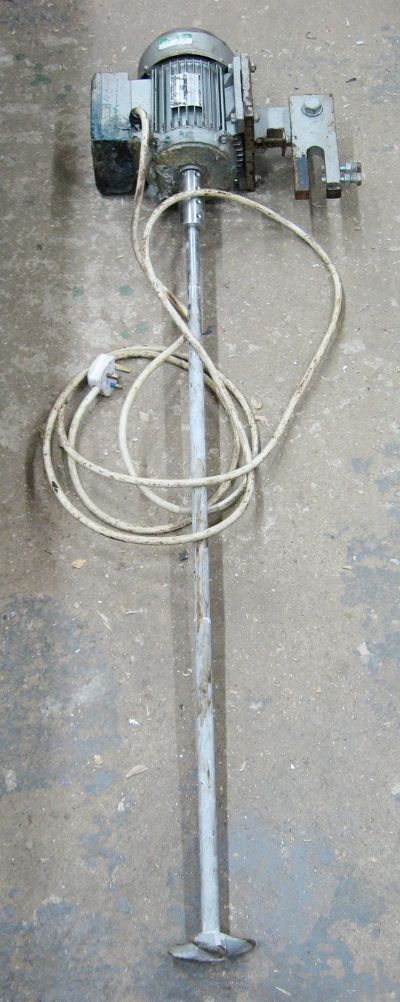
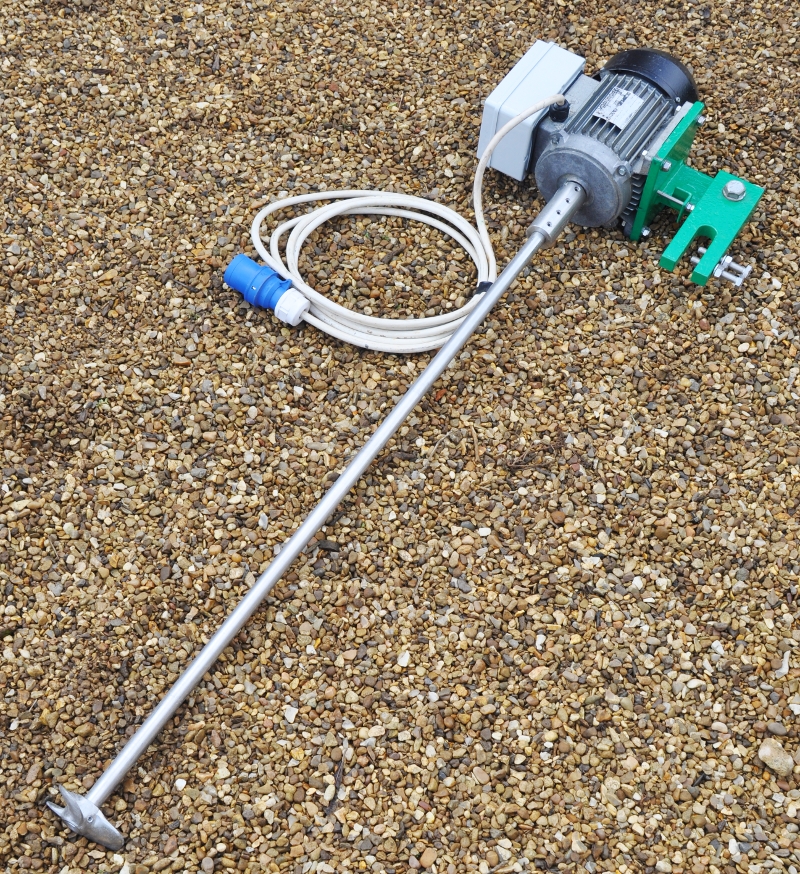
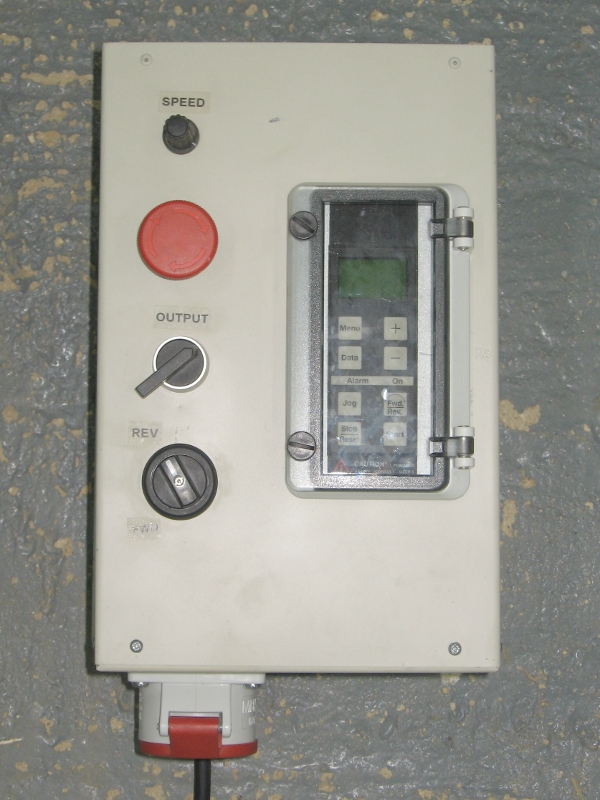
I
purchased this mixer used from a cleaning chemical supplier and spent a
bit of time cleaning, painting and refurbishing it. the main job was
the replacement of a badly cracked control box.
Mar 2016
4 UV/ Blacklights lights for photography or disco use.
July 2015
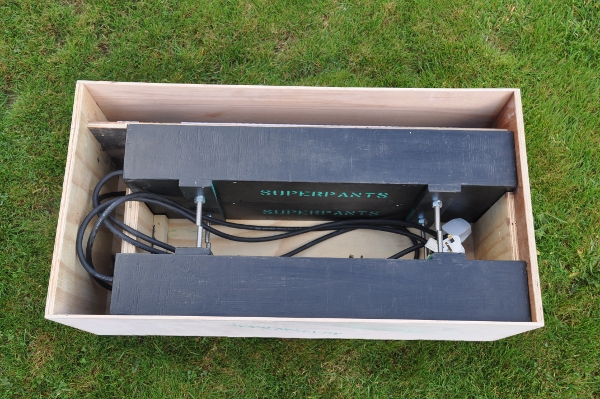
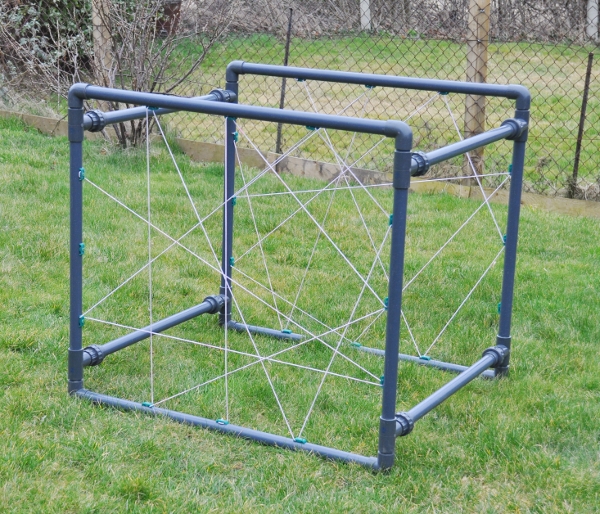
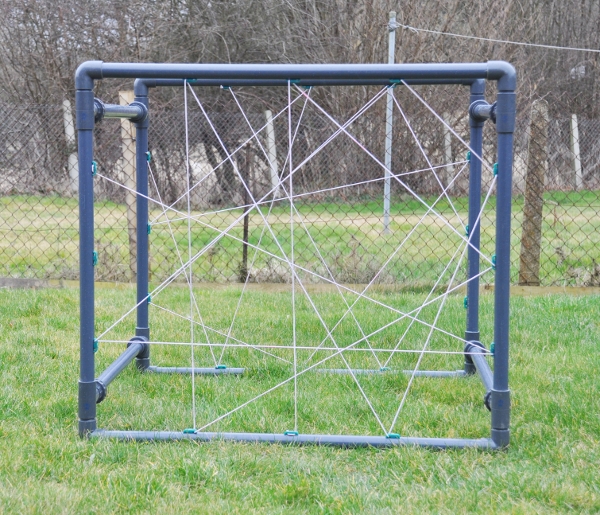
An easily dismantleable version of a bungee web to use as an obstacle. Made from 32mm PVC pipe and solvent weld fittings
Mar 2015
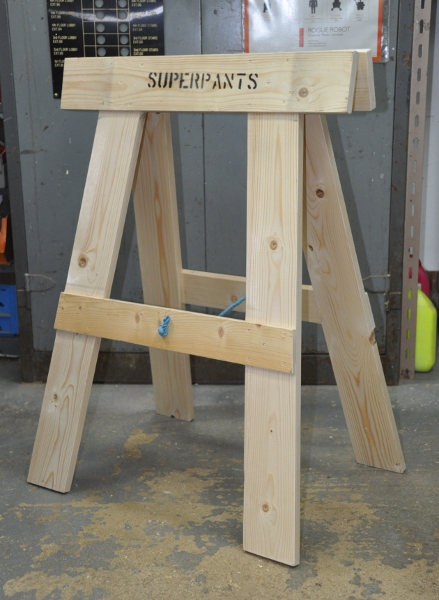
A
pair of trestles bit for use in the workshop. These replace a pair of
plastic moulded trestles bought from screwfix which turned out to be
rubbish, lasting less than a year.
Feb 2015
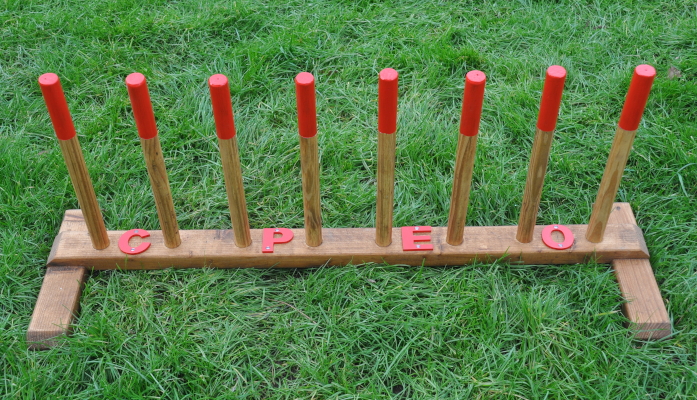
10
way basic rocket firing rack made from scrap timber salvaged from a
theatrical set, and using tubes cut from electrical conduit. The legs
are removable to allow easy storage. We use this for our annual Guy
Fawkes Night firework display.
Nov 2014
Inverter unit built from a module I pulled out of a scrap conveyor
belt system. All parts other than the socket were, scrap, surplus or
secondhand. Built to run a 3 phase pillar drill.
Dec 2013
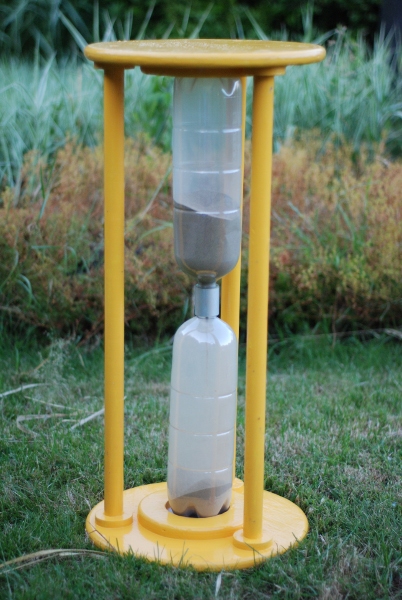
Giant
egg timer built for a games day. Timer is made from two litre drinks
bottles joined with a small plastic pipe fitting in their caps. Sand is
sieved block paving sand, all mounted in a frame made from routed 18mm
ply, MDF and broom handles.
July 2013
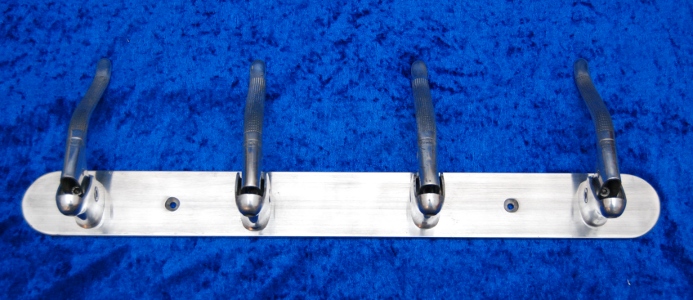
Two
coat
racks made from used weimann bike brake levers. One is affixed to an
aluminium bar. The Levers are fixed using cap head screws into tapped
holes in the bar. The other uses a piece of beech salvaged from an old
sofa and routed on the edges
The only significant change needed to the levers was to remove the tabs
on the clamp side. All parts used were scrap materials.
Mar 2013
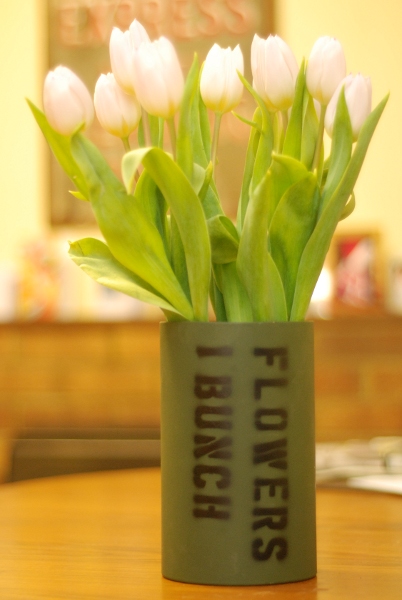
Flower
vase made from a scrap carbon dioxide fire extinguisher. Simply cut in
half and painted with matt army green spray paint (RAL 6031). The stenciled design is made using an interlocking stencil kit.
Mar 2013
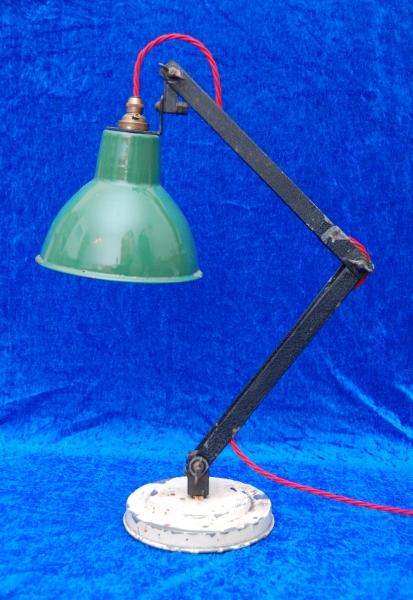
This
lamp was used by my late grandad, but had been languishing in his shed.
I have cleaned it up and fitted a new lamp holder and fabric covered
flex, giving it a new lease of life.
Mar 2013
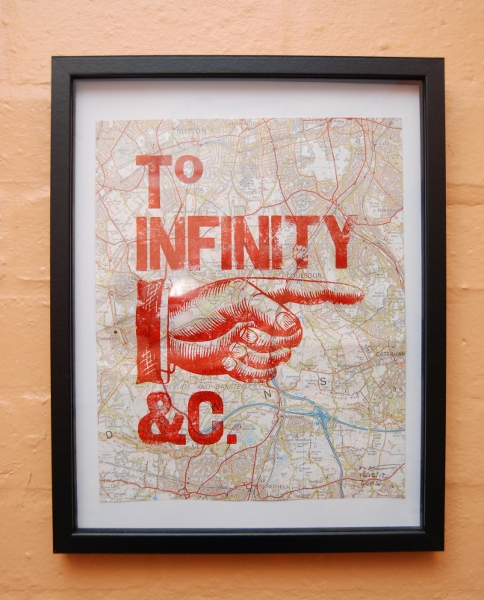
Framed
poster, now residing in my utility room. The poster is letterpress
printed using antique wood type, bought from a long disused printers
near Telford. The print is made onto a section of Ordnance Survey map.
I printed a very small run of these.
Feb 2013
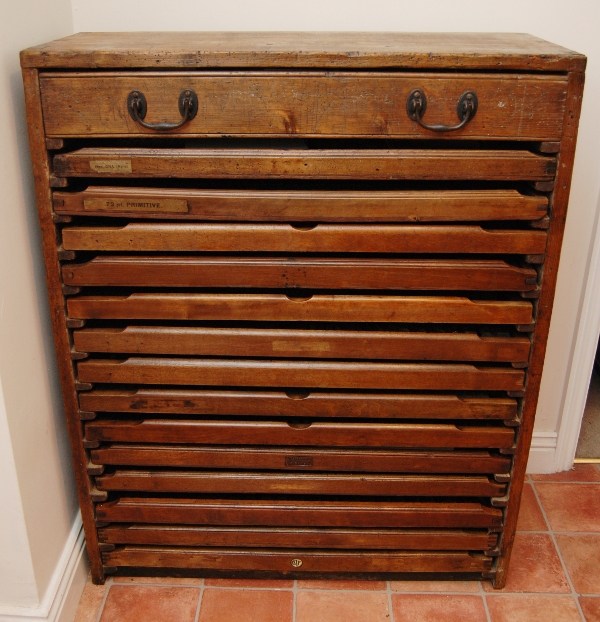
Printers
cabinet containing my collection of wood type. This is a real
hotch-potch of drawers, with the carcass looking like it was made by
the printer. All drawers were cleaned and re-french-polished.
Feb 2013
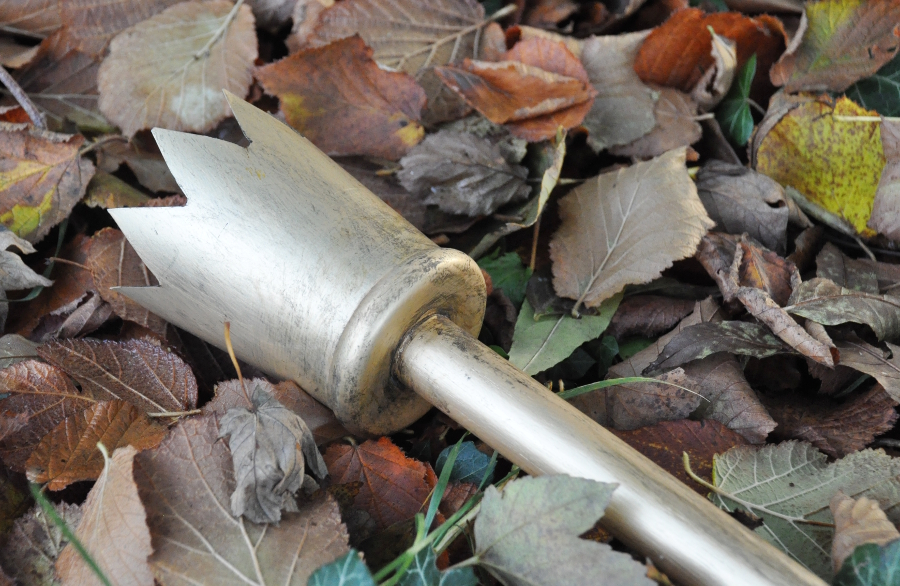
Staff
made as part of a max costume from "Where the Wild Things Are". Based
on the film version. Made from a length of dowel, door knob on one end
and stainless steel bathroom cup.
Jan 2013
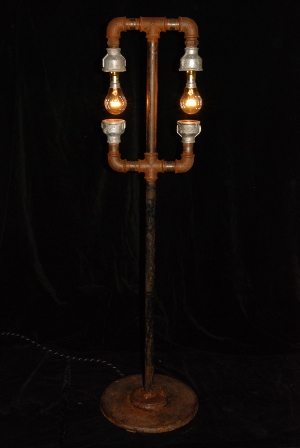
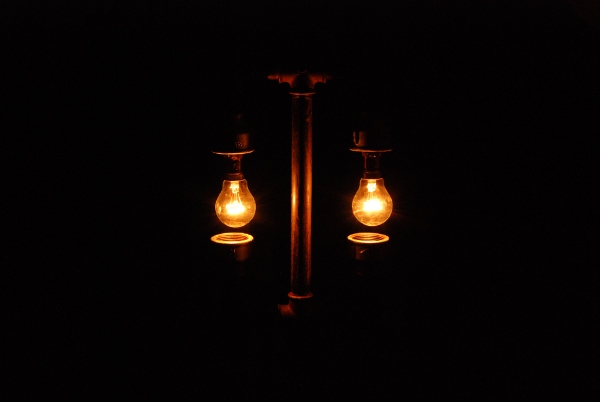
Steampunk
inspired lamp. Base is a gym stand salvaged from a skip many years ago.
Base pipe salvaged from a scrap yard. The remainder of the fittings
were new, 3/4" BSP malleable fittings. The lot was aged by rusting
using salty water and then coated with metal lacquer to seal it. The
mains cable is covered with a bootlace, and at present the unit is
dimmed with a variac, but I intend to put together a suitable dimmer.
Jan 2012
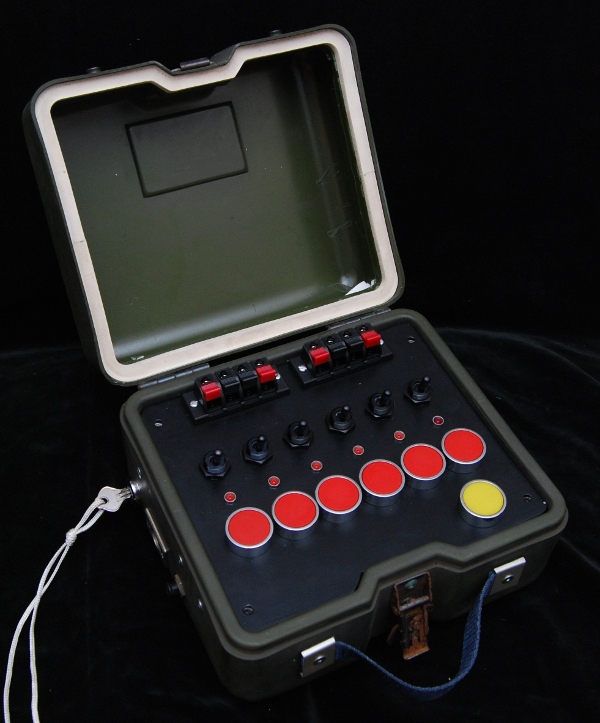
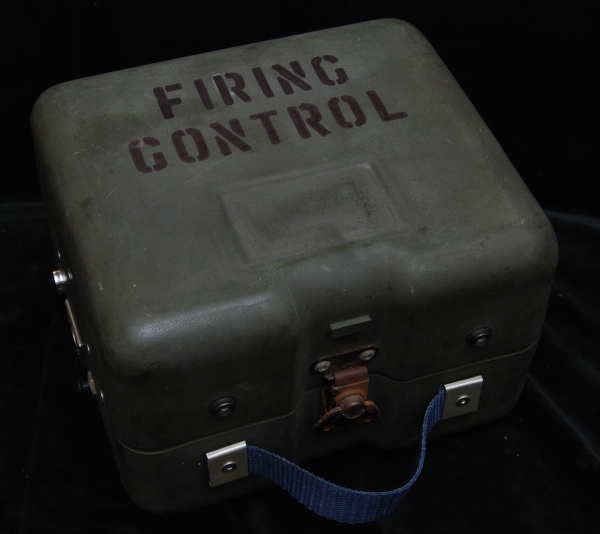
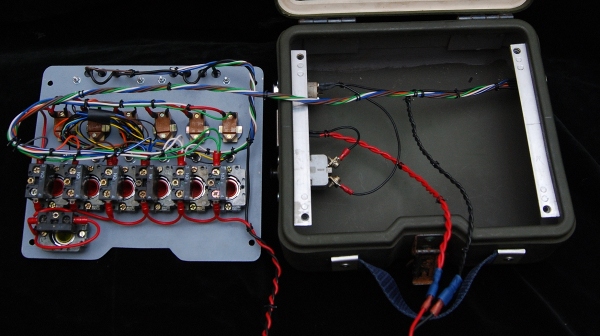
This
control unit was built particularly to control a couple of confetti
cannons I have built. The intention is that the unit can be used to
control any low voltage units. It consist of a box that used to contain
a gunsight, fitted out with a number of switches salvaged from surplus
or scrap equipment.
An aircraft circuit breaker and XLR socket along with key switch allow the unit to be isolated and protected.
Nov 2011
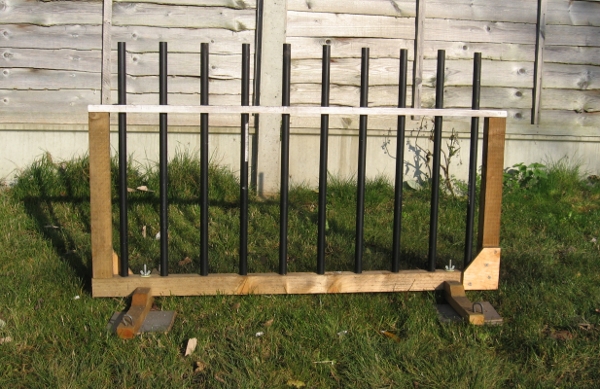
Set of stocks built from scrap timber. Pin hinges used to secure legs to make it simple to collapse down for storage.
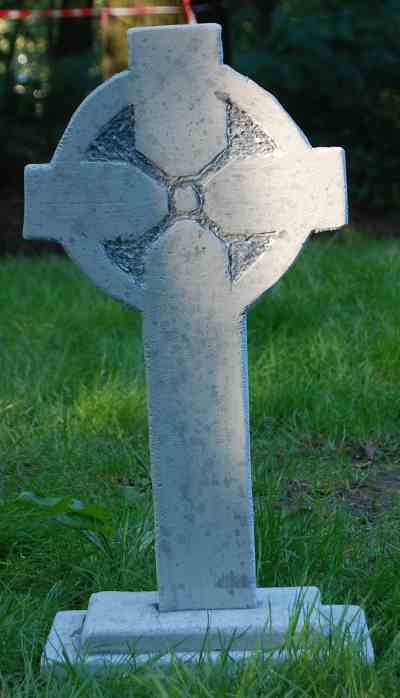
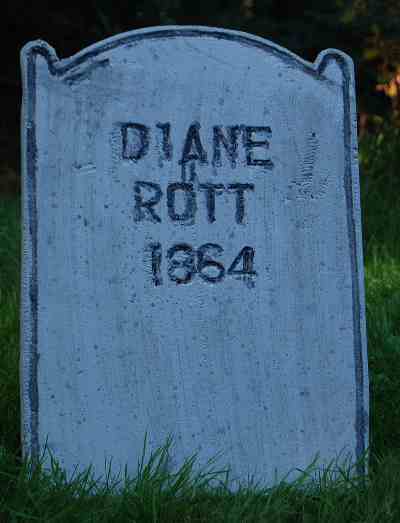
Tombstones were made for a Cub Scout Funday Haunted house.
They
were made from scrap Styrofoam rescued from some packing cases. The
shapes were sketched out onto sheets of newspaper, and then transferred
to the foam. The outline was cut using a hotwire cutter freehand. The
text was created by using a hotwire foam 'engraving tool' to melt the
incised letters through metal interlocking stencils. Other decoration
was created freehand using the engraving tool.
Once
the shape was finalised, the whole tombstone was roughed up with very
course (80 grit) sandpaper to take off all the corners. The stone was
then painted with two coats of light grey acrylic paint.
Detailing
was carried out with slightly watered down black paint in the text and
other grooves. The final touch was to spatter the stones with black
acrylic watered down heavily and flicked from a paint brush. The paint
finish looks acceptable from a distance, but doesn't stand up to close
scrutiny
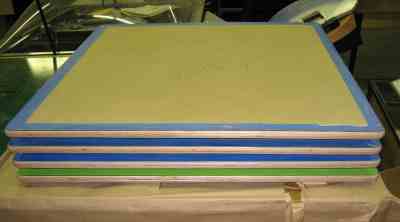
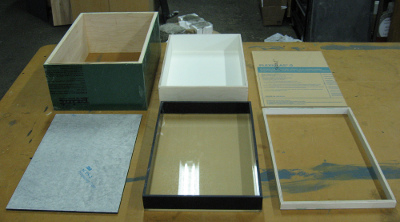
Examples
of some of the projects I worked on whilst at the Exploratorium- Table
tops for exhibits to be fixed to and a butterfly display box
(C) M.Pantrey 2009-2026